I’m finally returning to the Blogging world, and as such now trying to claim my blog on Bloglovin … hopefully this works!!
Canvaswork Dreams
After finishing my Ebb Tide canvaswork piece, I have a major urge to get more canvaswork pieces kitted up and ready to go … I’ve been slowly adding to my thread stash for a number of years now, and it seems I finally have enough in my stash to finally kit a number of pieces up (including more Rainbow Gallery thread stash that arrived this morning from a recent sale). The problem I will have, though, is that I don’t have enough canvas in my stash … will have to do a hunt under the bed for my canvas stash and see what I’ve got sitting around … but sadly not very much I don’t think. Canvas is like hen’s teeth to find ‘down under’, so I always have to order from Nordic Needle (or I used to buy from Nancy’s in Wellington, New Zealand). Looks like a New Year stash purchase may be in order, although I’d better make it a decent one as postage for canvas always bumps the price up astronomically, even though it doesn’t weigh very much it usually ends up being sent in a big box, pffft. I guess it will mean giving me an incentive to order the remaining threads I need for some other canvaswork projects at the same time … sadly threads like Rainbow Gallery are also like hen’s teeth to order down under!!
Anyway, on close inspection of my thread stash inventory on the PC (assuming it’s correct!), it seems I should have all the threads for the following designs, so the biggest problem I’m going to have is actually DECIDING, ‘cos there are actually a lot more now than I realised!! WOOHOO!!!!! 😀
 Flying Geese by Laura J Perin
 Holly and Ivy by Laura J Perin (freebie)
 Holiday Square by Laura J Perin (freebie)
 Spring Fling by Laura J Perin (freebie)
 Blue Birds by Laura J Perin (freebie)
 Polynesian Paradise by Jen’s Jems (I have the black canvas ready)
 Grace by Orna Willis (except I want to do the purple colourway)
 A Summer Drink by Orna Willis (I want to stitch both the Lime and Mint/blue versions)
 Reflecting Pools by Laura J Perin
 Blue Bayou by Northern Pine Designs (I have the blue canvas cut and ready to go)
 Mallard Collage by Laura J Perin
 Earth Spirit by Northern Pine Designs
 Surf and Sand by Northern Pine Designs
If you’re interested in getting started with canvaswork yourself, the following are some of my favourite websites for drooling and building up the wishlist:
- Laura J Perin Designs
- Northern Pine Designs
- Adorn by Orna (Orna Willis – who kindly has some charts available by PDF now)
- DebBee’s Designs (I am seriously in lust with Tropical Punch – I must, must, must buy that one soon!!)
- Gay Ann Rogers (she only sells a limited number of designs in general for one week a year, so you have to keep an eye out – quite pricey charts, but the charts are generally half a ream of paper full of instructions!)
- Needle Delights Originals
- Rainbow Gallery freebies (lots of freebies by Laura J Perin here)
- ANG Stitch of the Month – some freebie designs and lots of tutorials for various stitches
A couple of additional links for designers, although I haven’t tried any of their designs yet:
- Threedles Needleart Design (haven’t bought any of these yet, though, but great eye candy and temptations)
- Freda’s Fancy Stitching (another one I haven’t tried yet)
Not one but TWO finishes!
I lived up to my word and poor old Flossy (well, she’s a babe really, to say she’s only been around for a week or two!) has been put on the shelf for now … the urge got to me yesterday and I spent the afternoon catching up on recorded TV while finishing off two of my WIPs I mentioned in my last post.
First up is Ebb Tide by Northern Pine Designs. Oh boy, this was a fun design to stitch! I can’t say I’ll be in a hurry to stitch with Rachel thread again, but once I got clever and used some nail polish across the top of the thread where I cut it, it was a lot easier to use! It’s the first time I’ve ever done Jessica stitches, and they’re really quite cute, and easy to do once you get the hang of them! I did them slightly differently to how the instructions told you to do them, as I’d seen them done on some other needlepoint blogs … by tucking the last two stitches inside and underneath the previous stitches, so they sit perfectly. All-in-all I’m thrilled this one is finally finished … and I spent no time at all popping the next Northern Pine design onto the bars to start a new one!

“Ebb Tide” by Northern Pine Designs
stitched on Leventeen Blue canvas
with recommended threads

While I was trying to take a photo last night my camera was struggling a bit to focus … imagine my delight at the colours showing on the viewing screen when it will still a blur … it made me smile so I captured the image! 🙂

Here is the next design ready for starting … just need to find a couple of the missing threads (geez I hope I actually have bought these ones, otherwise I guess it won’t be started soon! LOL). If not, I’ll just have to find another canvaswork design to throw onto some bars … I think I always need to have a piece of canvaswork ready to go at a moment’s notice, it gives me such pleasure! 🙂

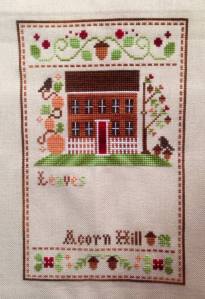
Then I decided to put the final stitches into LHN’s Acorn Hill – it didn’t take too long at all to pop the final words into place, and it became my second finish yesterday evening.

“Acorn Hill” by Little House Needleworks
stitched on 28ct antique ivory coloured Jobelan
with recommended Crescent Colours cotton floss
After that I decided to go back to old Flossy, and managed to put a few more stitches into the top wings – I didn’t bother taking a progress piccie as there wasn’t really too much to show … perhaps the next time you see her she will be finished … or maybe not … LOL.
I take it all back … sorry Flossy!!
I thought today I’d be stitching merrily away all day, but truth is I’m just not in a stitching mood … and seeing as my foot is only slightly tender today I decided to check my PO Box … also not conducive to finishing off Flossy! You see the contents unexpectedly contained my last order from 123stitch – which means the missing threads I’ve needed to finish off two earlier (loved) projects that had to be put to one side until the threads arrived. So now I’m REALLY torn between treating myself to some self-indulgent stitching with projects I love … Perhaps I’ll quickly finish off Acorn Hill while I have the lounge to myself this afternoon, then back to Flossy this evening after the flatmate returns home … oh decisions, decisions!!

The two projects I can now finish are LHN’s Acorn Hill, and Northern Pine’s Ebb Tide … plus I now have the proper beads for Victoria Sampler’s Fire Sampler, so I have no excuse not to go back and pick that one up again either … I now just have to suck up the mental energy and confidence to go back into that one and withdraw threads ready for the next drawn thread band. This is how they all look now, while waiting to be returned to the stitching frame:


I really need to get my confidence back in my stitching, there are so many of the projects that I have to work on that I find intimidating now, and I NEVER used to let my stitching intimidate me … I really do want to get back into my non-XS stitching and back to doing some class pieces again. We had a stitching get-together with friends on Sunday, and Rowena was stitching on a piece doing hardanger and whitework, and I had a real yearning to get back into it myself. I think I’ve just got so over-tired and overwhelmed this year with work and home that I’ve felt permanently drained. One of the things I’m really excited about is that the department that I work for is moving back to Mascot to join the rest of the corporate departments, meaning my 2-3 hours a day commuting will be reduced to 1 hour maximum. That in itself is brightening up my mind, and it’s bursting at the seams thinking of all the possibilities that opens up and getting back into my old routines.
Hopefully the latest cortisone shot did the trick as well, which also means I can get back to walking before or after work once again and start burning off some excess weight and getting fresh air … there will soon be no excuses I can fall back on!! So time to suck it up Shackles and get cracking on getting life back on track once again, both with my stitching and my health!! 😀
Update on Flossy
Old Flossy here is getting a fair bit of ‘love’ at the moment … mainly because I just dearly want to have her finished so I can move on to something that gives me pleasure. I’m also worried if I put her down I’ll never pick her up again. Tomorrow I have a day off work with my feet up so I should hopefully be able to put it in some decent stitching time … I’d be thrilled to see her finished by the end of this weekend!
As for why I’m having an enforced stitching day, it’s all thanks to my latest cortisone injection I had in my foot today … and they generously used a local anaesthetic and ultrasound guidance so it was MUCH MUCH less painful than the last one done by my butcher GP! As long as the pain stays away tomorrow it’ll be a great lazy day at home! 🙂

Miss Valentine, aka “Flossy”
I don’t know what possessed me … I purchased Miss Valentine by Mirabilia when I truly dislike the colour pink. Her dress on the cover picture looks extremely pale, with just a hint of pink really, so for some reason she appeals to me. Even though she’s not my usual choice, I thought she was lovely, truly delightful … until I started stitching her this week. I feel like I’ve just pushed myself through the gates of hell … stitching hell … OK, perhaps an exaggeration, but I seriously didn’t expect the vomit-inspiring candy floss pink to be the main colour of her dress … I’m hoping like heck that when the other colours are added that the colour will tone down somewhat! The way I’m looking at her now is that she may just end up on Etsy or something at the end of all this!! Poor Flossy, I do hope she tones down a little bit … I guess the alternative is that I just suck it up and unpick what I’ve done and do an entire colour conversion … which I suppose is kind of early enough to do this … or to finish her off and put her up for sale on Etsy … or gift her to a dear stitching friend when it’s finished … oh decisions decisions, what to do! Poor old Flossy, I don’t mean to be so cruel to her, but she’s … well … she’s just not “blue”!! Or lilac … Or frankly any other colour that’s not putrid, poxy, candy floss pink … !!

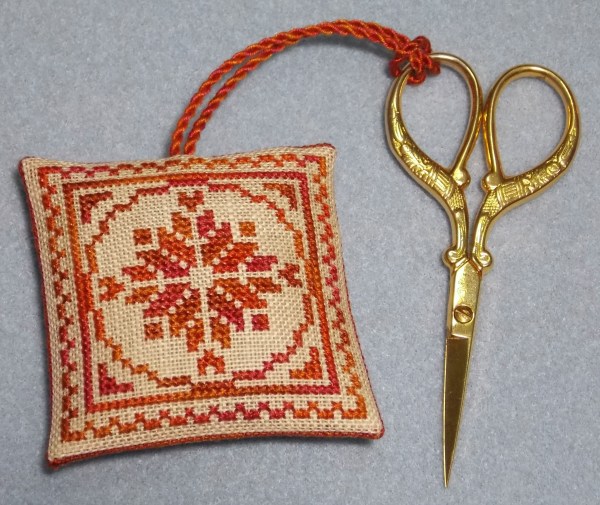
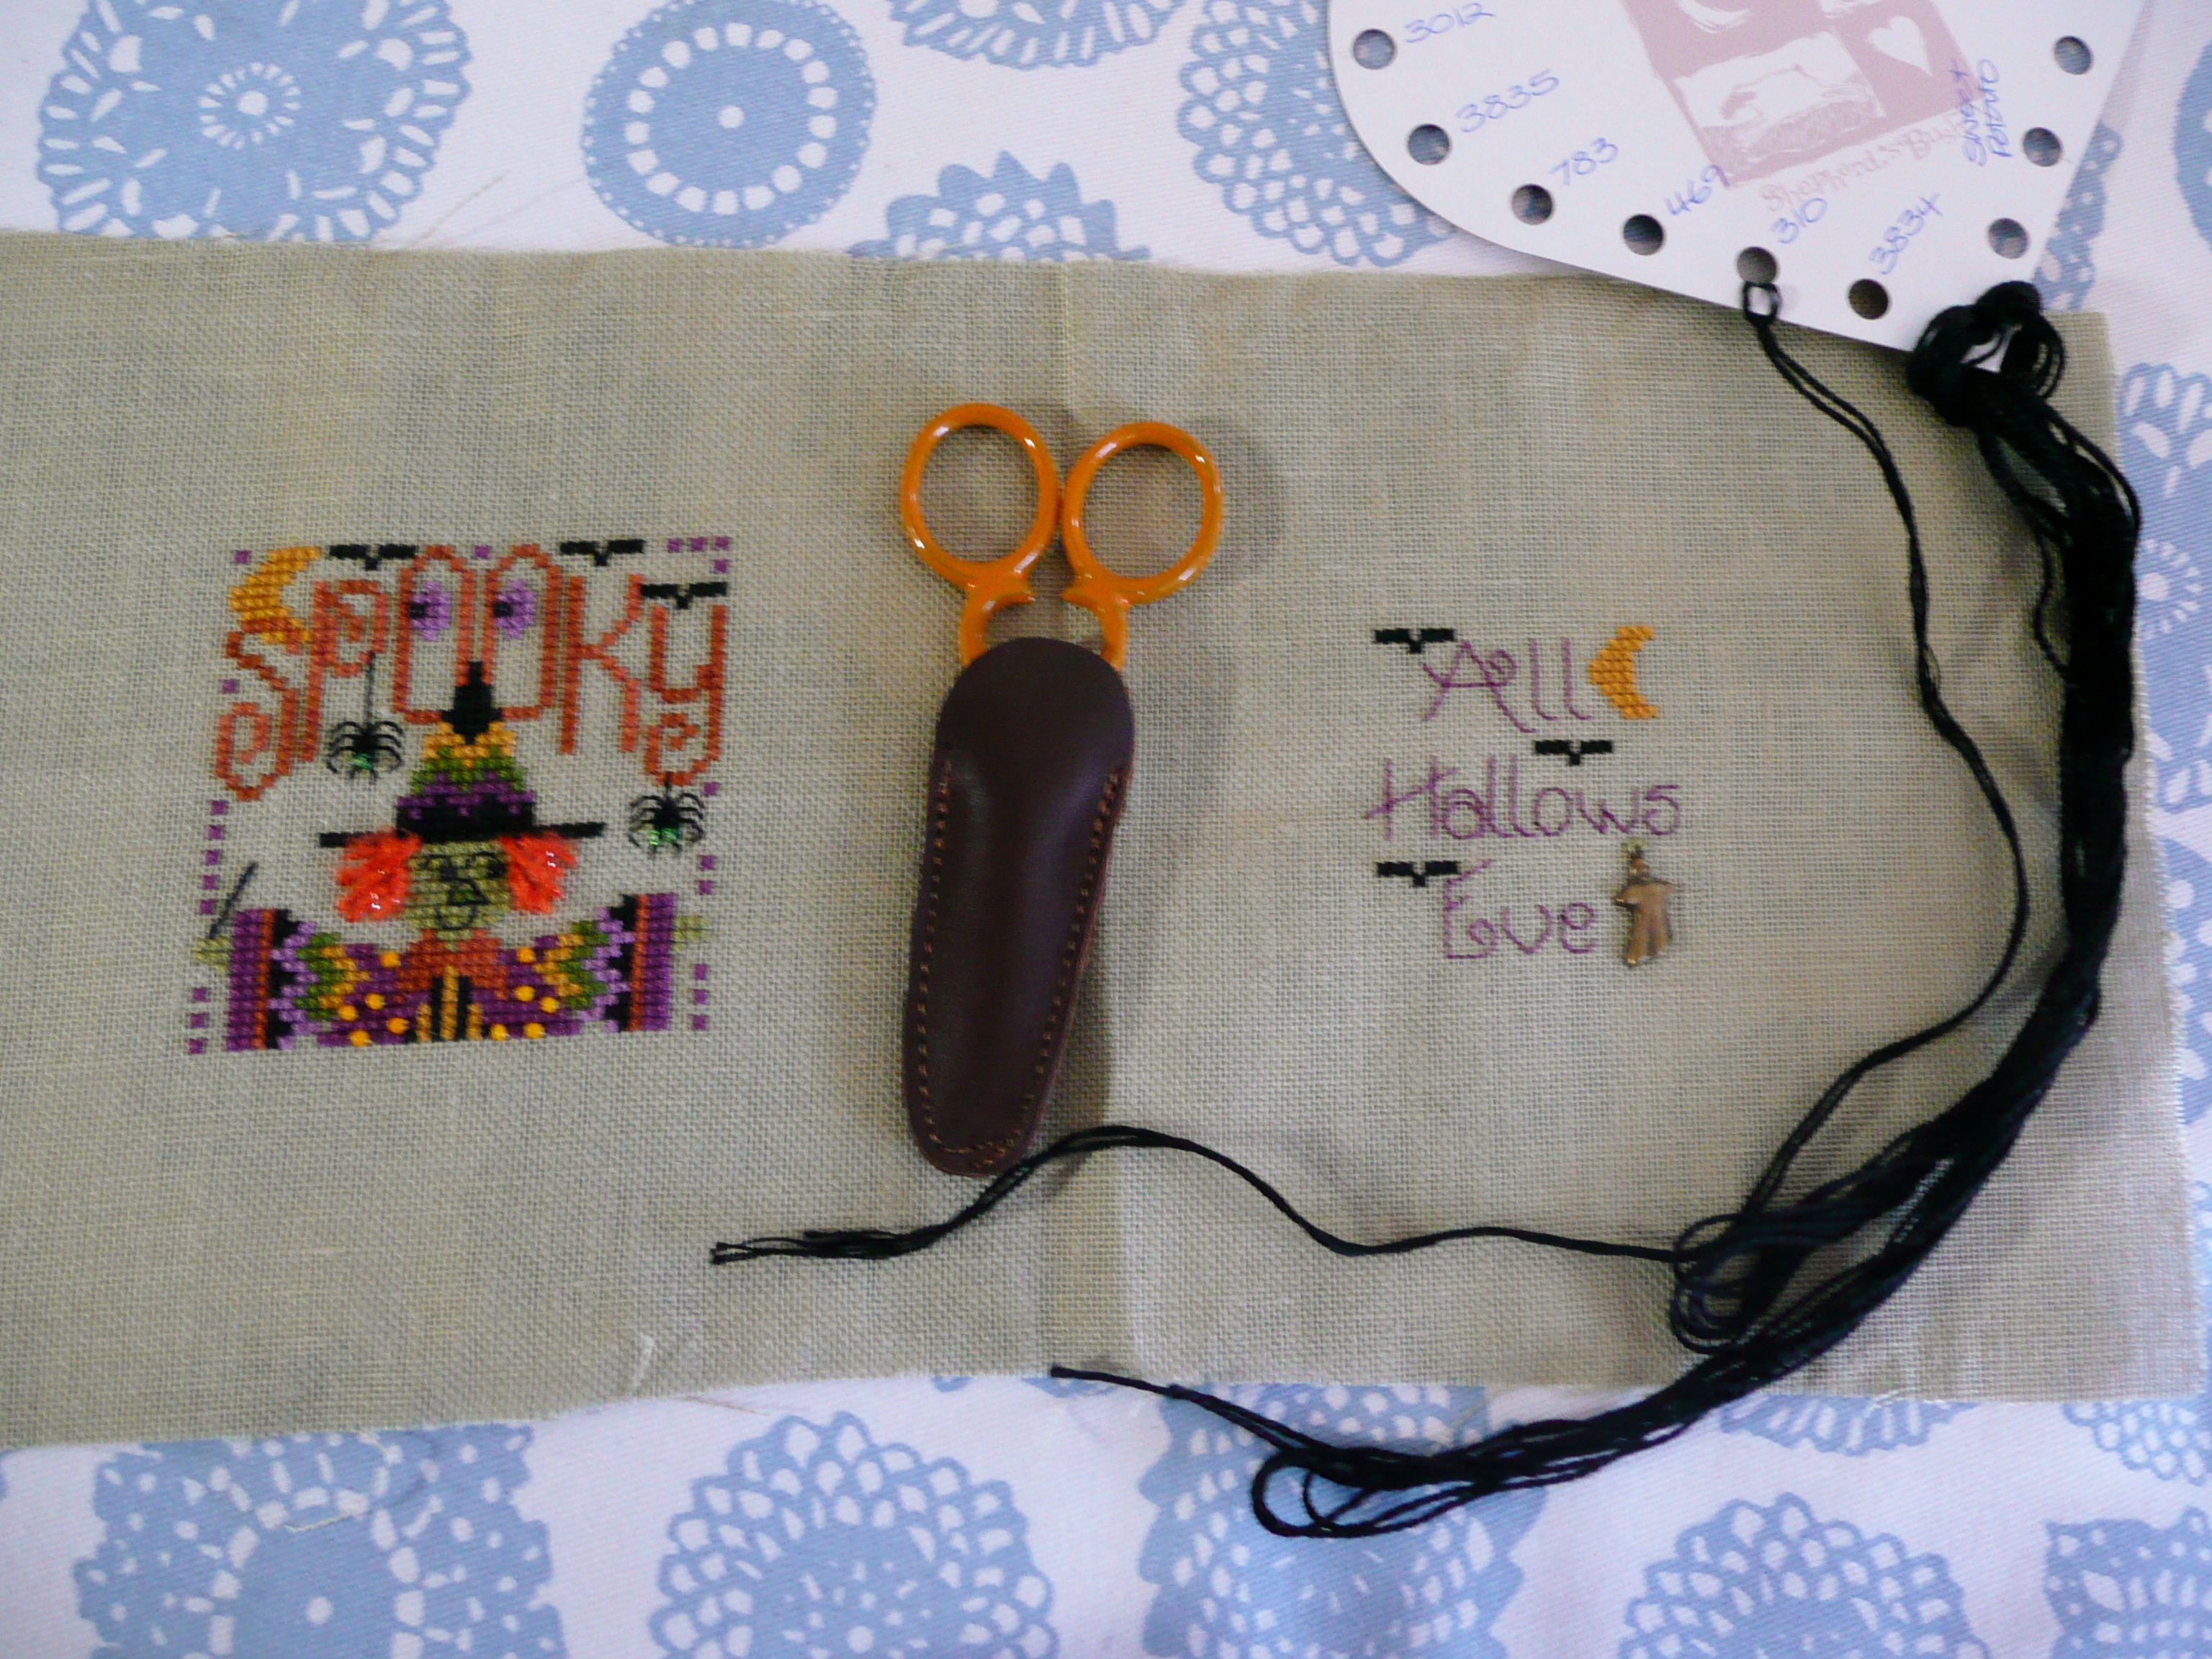
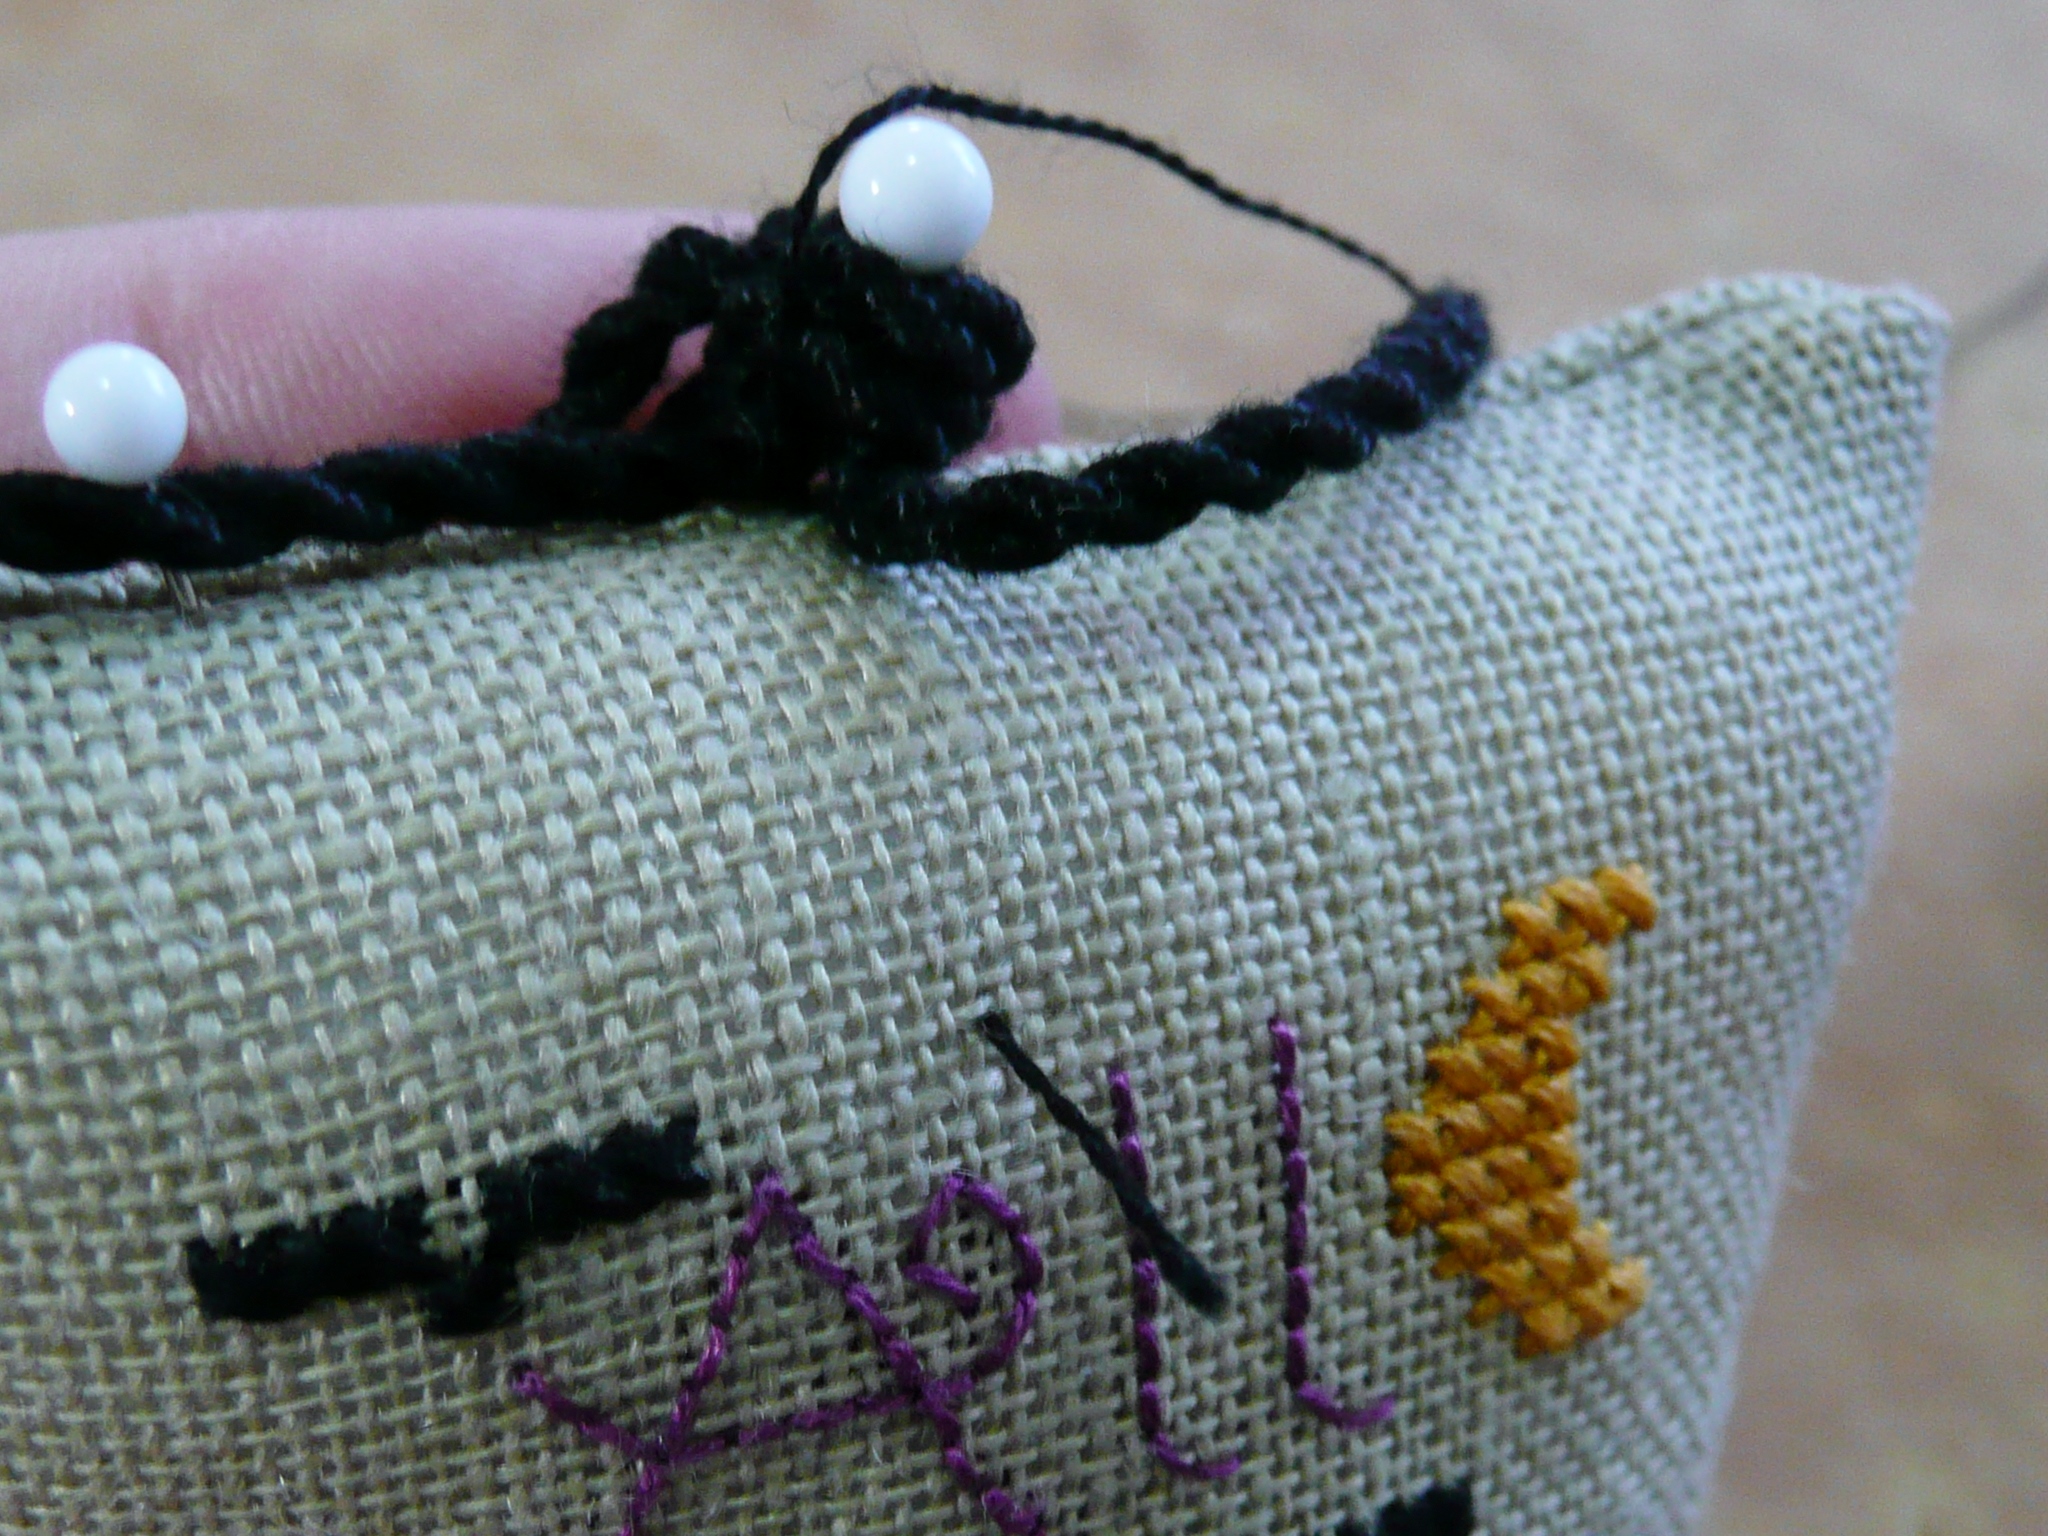
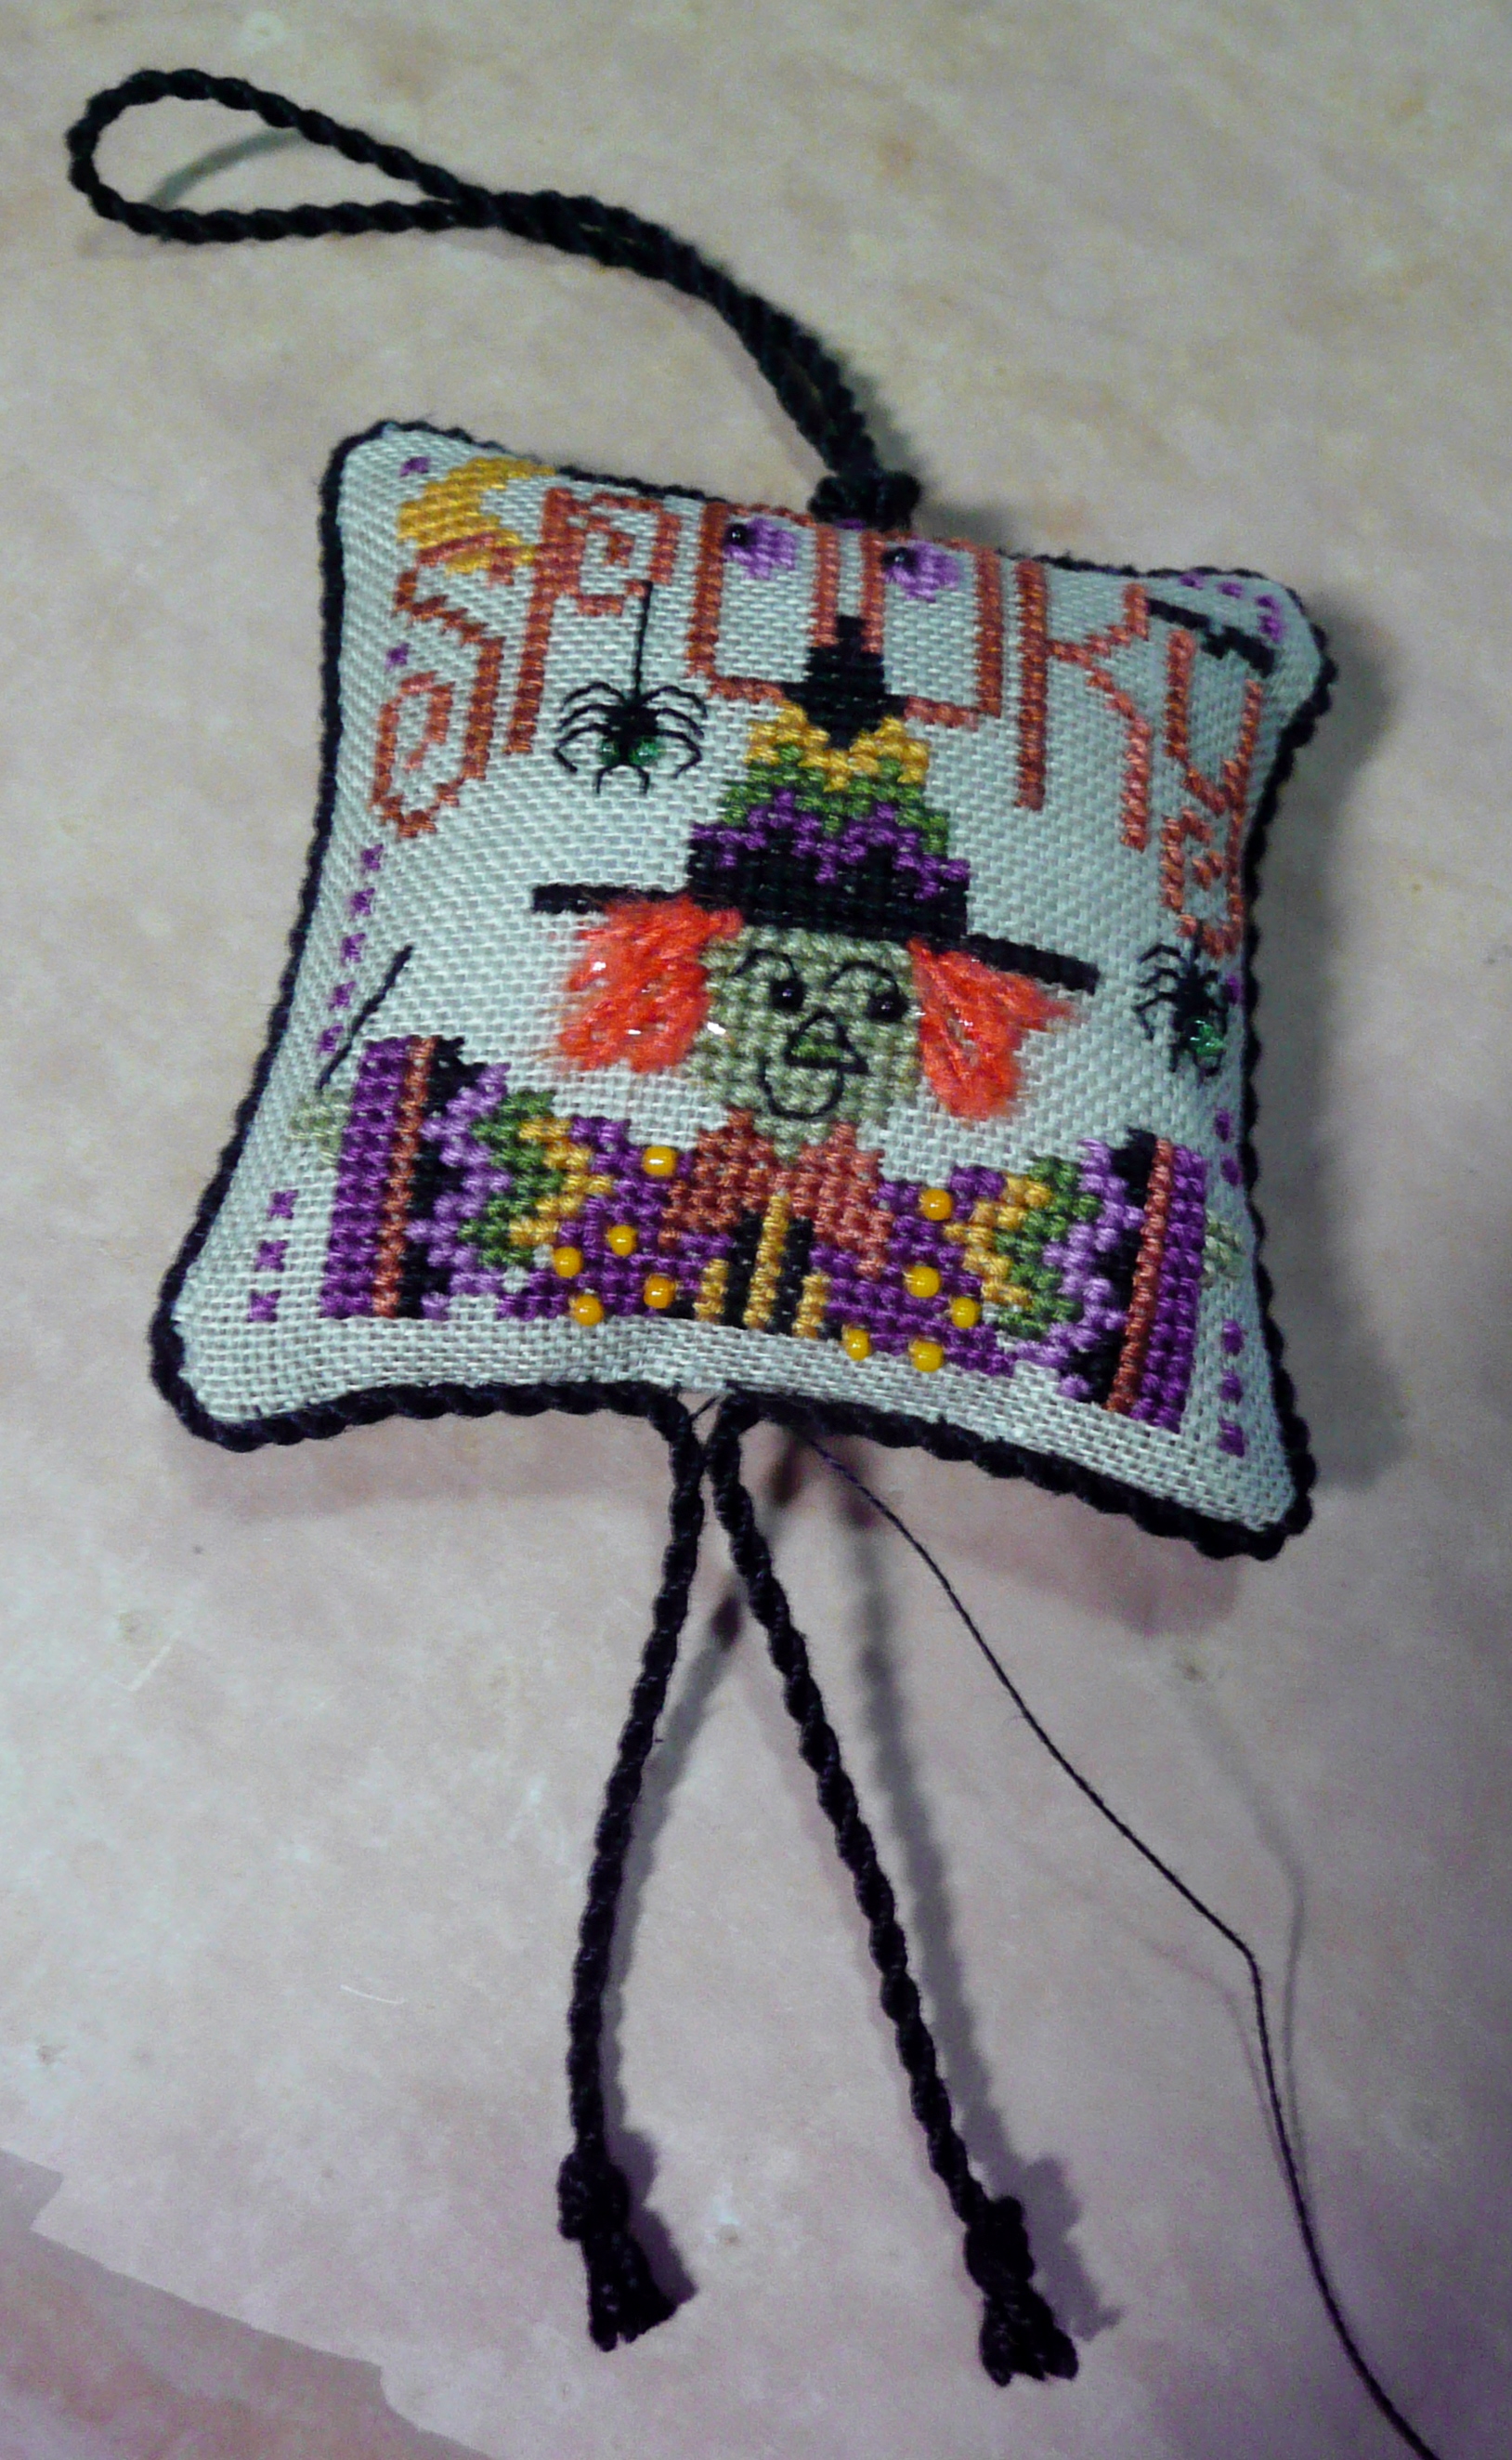
After my little whinge, I’ll brighten up a bit to share what I did two weekends ago, and hadn’t realised that I haven’t shared yet. While getting the scissor fob tutorials ready, and making up cording for the tutorial, I also dragged out a few pieces that are half-finished but just waiting for cording to be done and had a major cord-making session. I now have a bunch of ornaments etc that have cording all ready to go … but, um, yeah, they’re still sitting in the finishing pile the same as they were before {{cough}}. But they have cording now, so that’s closer to being finished than before, right?

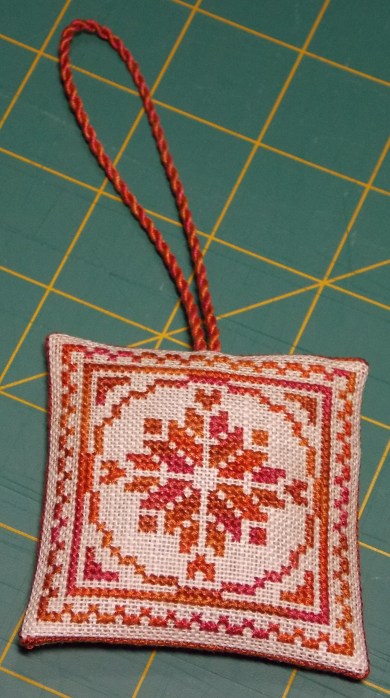
I also managed to sit up one evening and quickly completed the ladder stitch closures on this bunch of ornaments. Some of these were stitched by my Mum and I did the finishing of them all. Not entirely sure I’ll bother putting up the Christmas tree this year seeing as I won’t be here, and I don’t spend any time in the lounge any more with the flatmate taking it over, so they may not see the light of day until next year … but at least they’re finally out of the finishing pile and into the ornie box!
Here are Mum’s ornaments:


And mine:


A few small finishes
Not much housework was done over the last weekend … instead I spent the weekend stitching a few small freebie designs, and a wee spot of baking on Sunday. I’d been doing a bit of baking recently – Red Velvet Cupcakes last Monday to welcome my colleague back to work (and to celebrate being able to go back to a single person’s workload once again!). Then I found out the same colleague has his birthday on Halloween, so I spent a few mid-week cooking hours in the kitchen making two fruit flans. After this week’s delicious baking attempts I’ve now been officially dubbed “Team Chef” … but not entirely sure I want that title!! LOL.
Last week I also managed to stitch a small chart I’ve had kitted up for a long time:
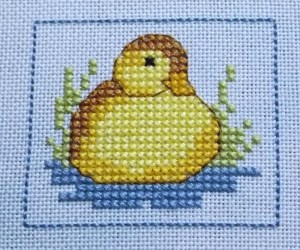
“Duckling” freebie by Lesley Teare
(was on http://www.cross-stitching.com, but no longer there sorry!)
stitched on 28ct hand-dyed ‘sky’ Jobelan
with recommended DMC threads
Then this weekend I decided to stitch a letter “A” on the same fabric to use as a backing for a scissor fob:
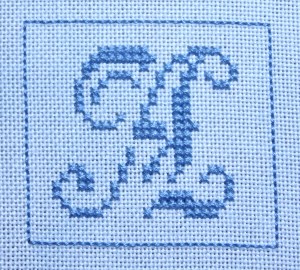
Freebie chart from an old french Sajou chart (Sajou 361) – chart still available here
stitched on 28ct hand-dyed ‘Sky’ Jobelan
with DMC floss
The other freebie stitching I managed to finish was as follows:
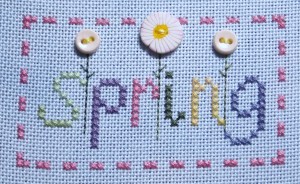
“Spring” freebie by Lindy Lane Designs
(sadly it seems they are no longer in business, so I can’t provide a link to this one)
stitched on 28ct hand-dyed ‘sky’ Jobelan
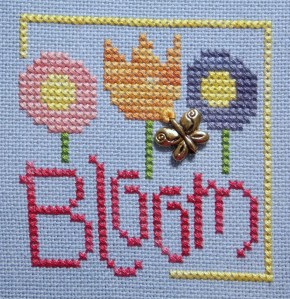
“Bloom” freebie by Lizzie*Kate
Chart still available here (scroll down to the middle of the page)
stitched on 28ct hand-dyed Lugana (not sure by who, it’s a VERY tight weave!!)
with recommended GAST/WDW threads, with the exception of Harvest Moon
(I subbed with a Ltd Edition GAST thread)
As for what’s next? I need to do one more scissor fob tutorial quite quickly to help out a fellow stitcher with a specific finishing method … otherwise I just might have to pick up a new start! My latest order is on its way from 123stitch, which means my replacement thread for LHN’s Acorn Hill is on it’s way – I figure I can probably sneak in one more new start/finish before it arrives and I ‘have to’ concentrate on my WIP … haha, first time I’ve said that, that’s for sure!! 😛
Scissor Fob Tutorial #3 (with whip-stitch edging)
This tutorial is the next in my list of the many ways you can finish a scissor fob. The whip-stitched edge is one of the most versatile ways to attach two stitched pieces of fabric together, and is the perfect stitch for finishing scissor fobs. The next tutorial will include a beaded edge and tassel … so watch this space for that one … and in the meantime I hope you find the below tutorial of use. As always if there is something that is unclear or you have any questions don’t hesitate to scream out!
Scissor Fob with whip-stitch edging
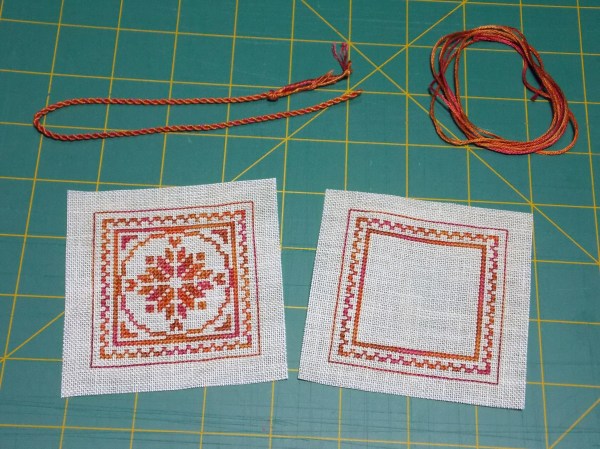
You will need:
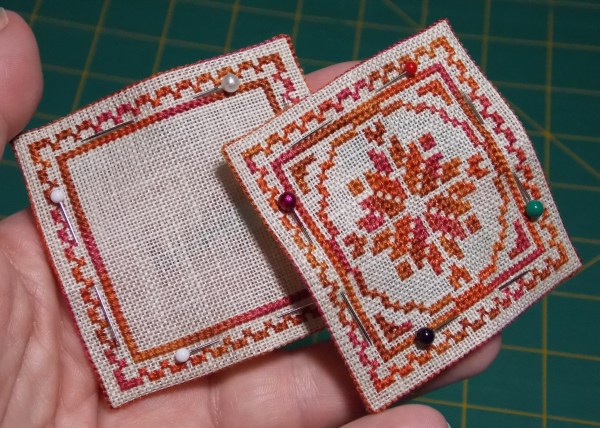
- Stitching (identical size front and back)
- Cording or ribbon for the hanger
- Matching cotton floss for the whip-stitching
- Your choice of filling (eg polyfil, teddy bear pellets, etc)
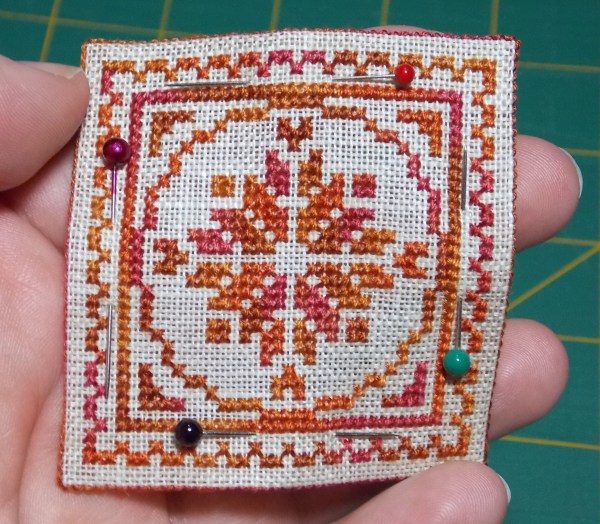
1. Firstly you need a back-stitched line of stitching outside your stitched pieces, both front and back. The stitching must be identical in size on both the pieces, so make sure you count very very carefully, or your sides won’t match when you whip-stitch the sides together. In most cases I stitch approx 2 stitches away from my main stitching (ie 4 threads away on linen and 2 squares away on aida fabric).
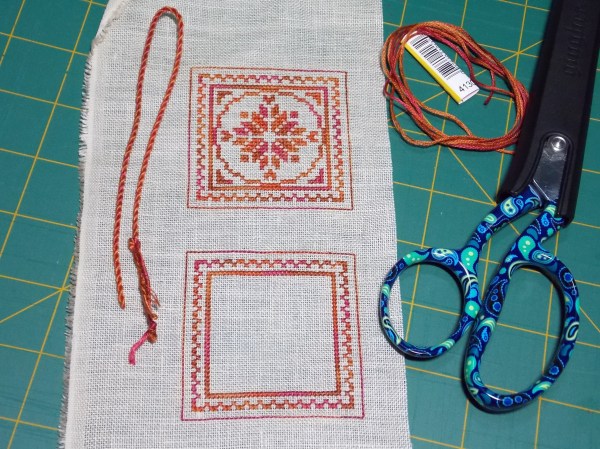
2. Cut away the excess fabric from each piece, leaving approx 3/4 to 1cm seam allowance.
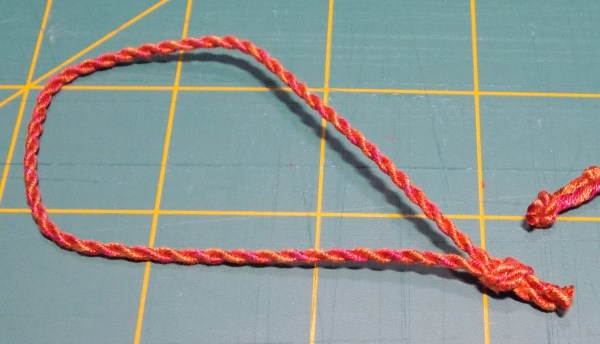
3. At this point I realised I hadn’t yet made myself a piece of cord, so I nipped off to quickly put a piece of cord together … see the previous tutorial for making your own cord. Alternatively you can use a piece of ribbon with the ends knotted together in the same way as the cord below.
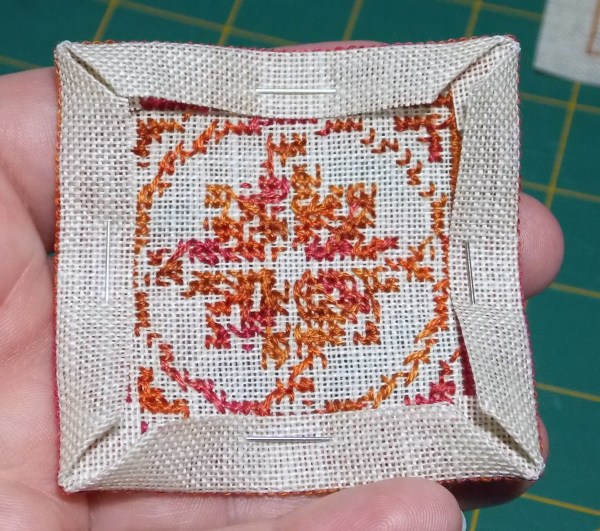
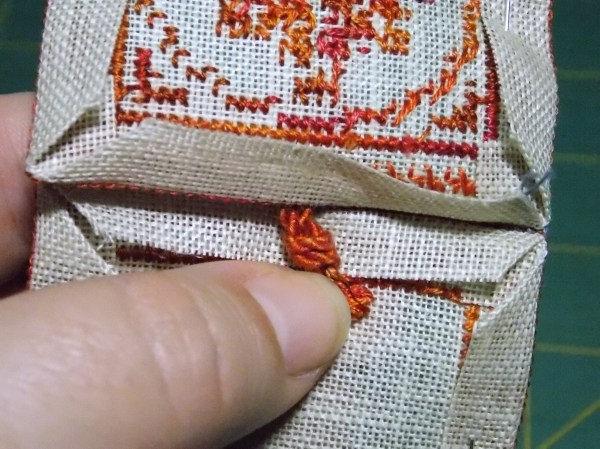
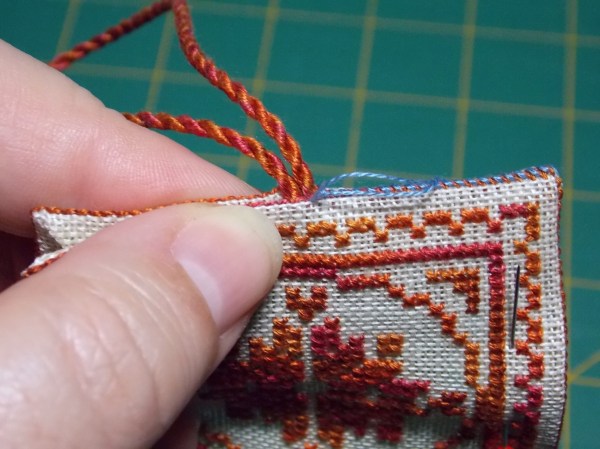
4. Now we need to turn over the seam allowance of your stitched pieces. First of all I fold over the corners right at the hole of the corner stitches of the back-stitched line.
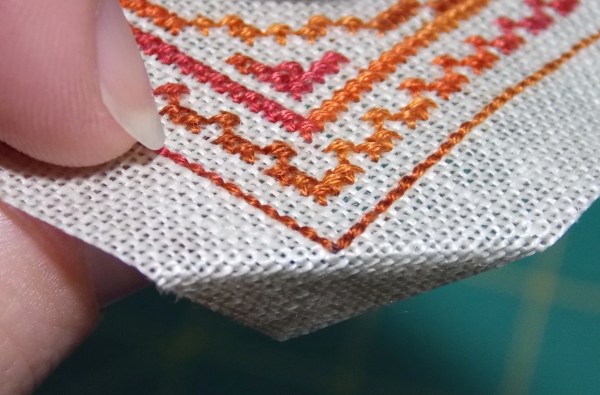
Then fold over the seam itself along the back-stitched line of stitches.
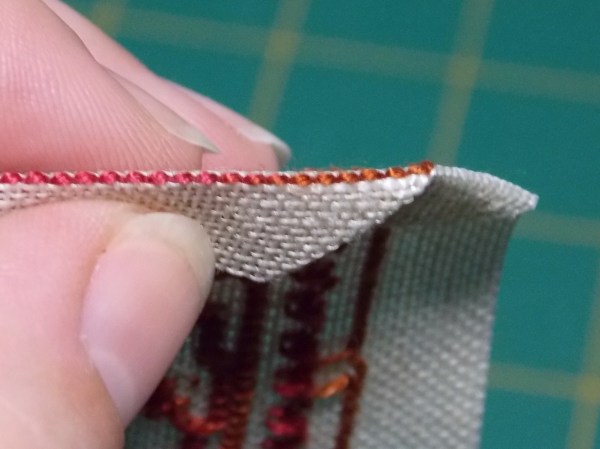
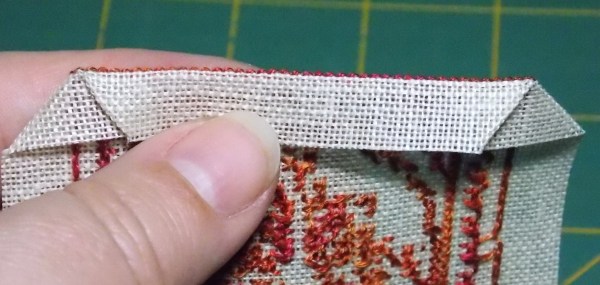
Continue all the way around until all the edges are folded over. You may prefer to hold down the seams with a pin – if you do this, though, don’t forget to pin it from the right side so you don’t accidentally stitch your pins on the inside of the fob!
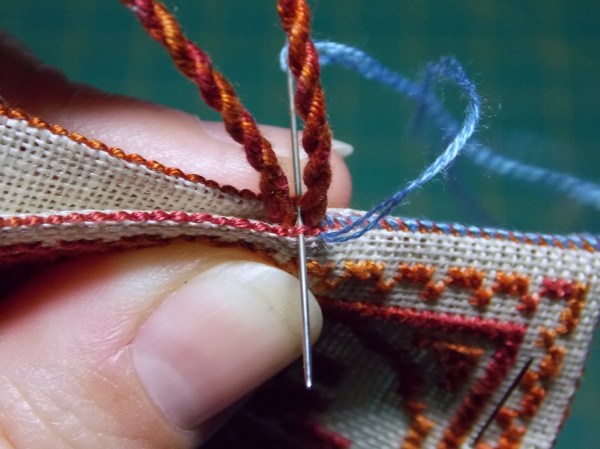
5. Now we start to back-stitch around the fob and stitch the front and back pieces together. I usually use 2 strands of cotton floss for my edges. Note that I have used a contrasting thread here so that the stitches show up more clearly – you can choose to do this if you want to have a contrast of the threads, but normally I prefer to use a complimentary thread colour to the fob, and usually use the same colour for the back-stitched seam lines and for the whip-stitching.
Start by coming up with your needle in the corner hole of one of the back-stitched lines. I usually cheat and use a small knot to anchor my thread in the seam allowance.
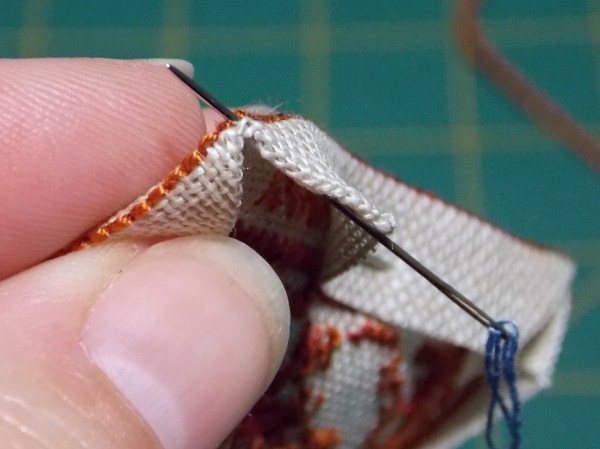
Then take your needle under one of the back-stitches – start with the first stitch on each side.
And continue to take it under the stitch that is directly opposite on the other piece of fabric (once again the first stitch on that side of the fabric).
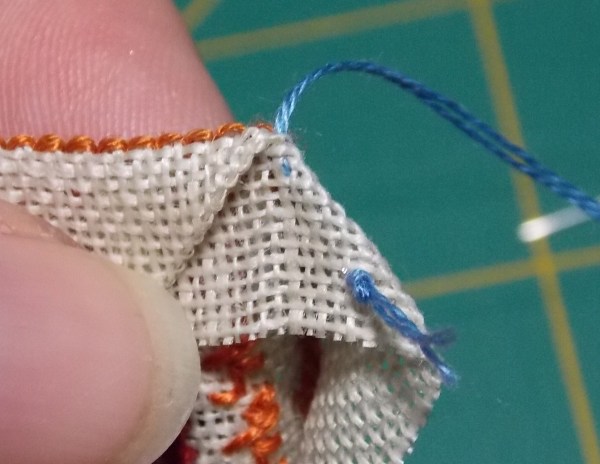
Then come back to the first piece of fabric, and take your needle under the next stitch and once again underneath the stitch directly opposite.

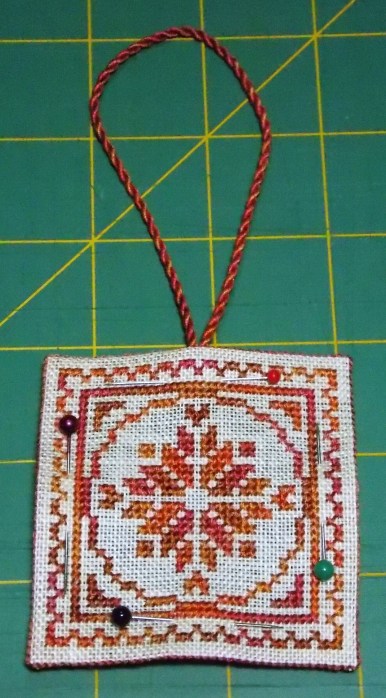
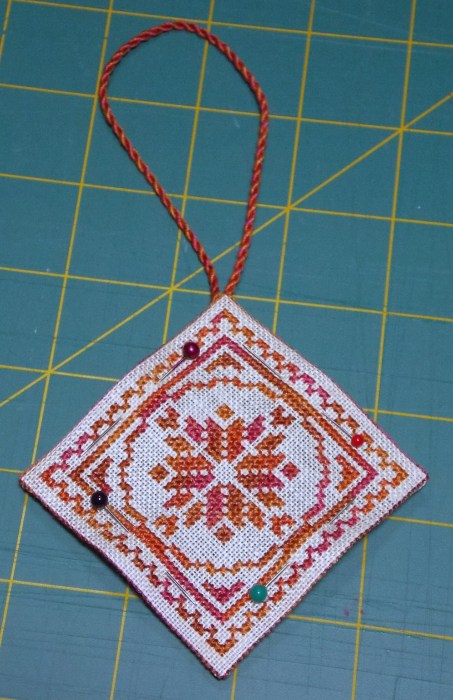
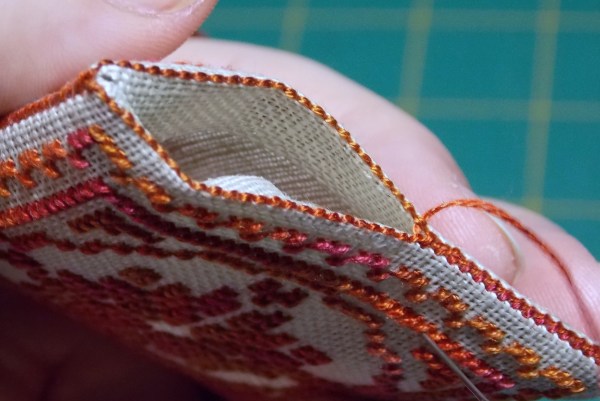
You continue this way until you come to a point where you want to attach your fob hanger. In this case I could have made my fob to hang in a diamond shape, or in a square shape … I ended up deciding on the square shape this time round.
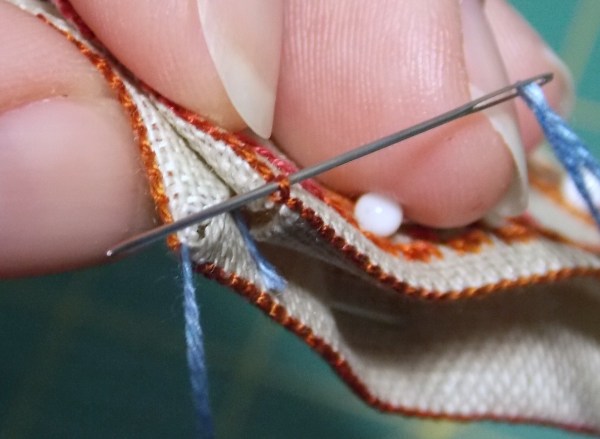
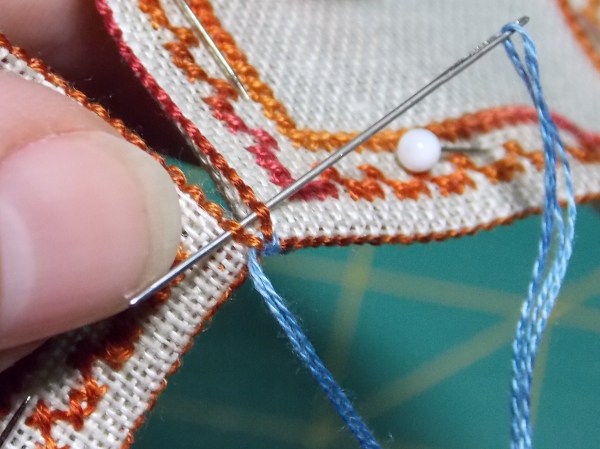
To do this I continued whip-stitching the seam until I almost came to the half-way point across one of the sides – then I inserted the knot of the cord into the seam.

Continue to whip-stitch through each side of stitches, but for the next two stitches you’ll need to pass your needle through the centre of the cord as you stitch – this will ensure that your cord doesn’t come free and helps to cement it neatly in place.

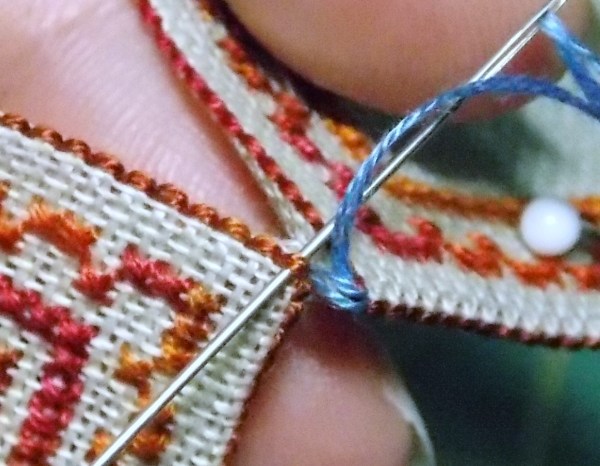
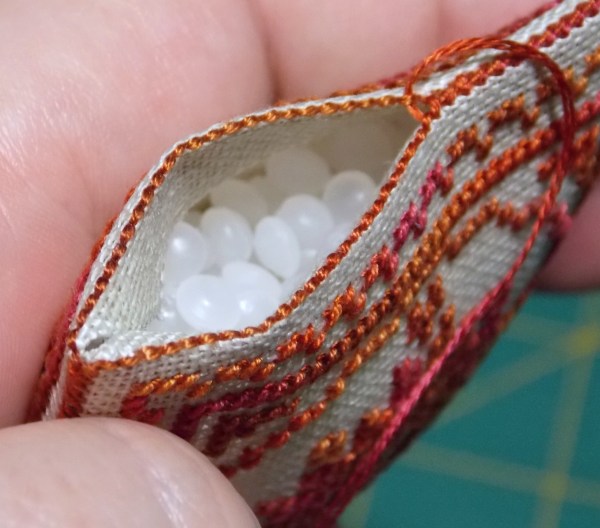
6. Continue to whip-stitch all the way around 3 of the sides, then leave a small opening on the 4th side so you can insert the filling of your choice. In my case I’ve used my favourite choice, teddy bear pellets. (You will see that I’ve now started using the ‘proper’ coloured thread now to complete the finishing.)
Once you have filled to your desired level, continue to finish off the remaining stitches.
Finish off your thread at the end, and voila, your fob is all finished!!
I hope you enjoyed the latest tutorial – thanks again for your previous comments on the other tutorials, it helps the motivation to keep doing more! 🙂

Scissor Fob #2 Tutorial (with corded edging)
This is the latest tutorial I’ve just posted on the Focus on Finishing blog … I hope someone finds it useful! 🙂
Scissor Fob #2 (with corded edging)
This time round the scissor fob I’ve chosen is a simple pillow with a corded edging. I think it is better to use a home-made cord for this, as it is softer to manipulate, but you can always try to use purchased cord if the home-made cord intimidates you too much!

Materials needed:
- Your chosen stitched piece, including a front and back
- Polyfil stuffing or other stuffing of your choice (eg teddy bear pellets or crushed walnut shells)
- DMC pearl cotton or cotton floss for cording
- DMC cotton floss for attaching the cord
- Sewing needle (either a sharp or tapestry needle)
- Pins and scissors
1. First of you you need to cut the front piece of your stitching into the desired size. I find the easiest way is to count the number of threads when using linen or the number of holes when using aida. In this case I followed the design’s suggestion and counted out 25 threads from the stitching, then I pulled out the next thread – this makes a clean line for you to cut the excess fabric away. Then once all 4 sides of the front piece have been cut, place it face down onto the back piece, with right sides of the stitching facing each other, and cut out the back to be the same size (don’t forget to make sure the back piece is centred correctly before starting to cut – I usually do this by holding the two pieces up together in front of a light source such as a bright window). Pin the two pieces together.


2. Sew a seam around the edges, but leave an open gap at the bottom seam to allow you to turn it inside out and add the stuffing. I usually leave one long tail of the sewing thread that I use for sewing up the opening at the end.


3. Cut away the corners, but don’t cut too close to the stitching, otherwise it may unravel when you turn the piece inside out. Then trim back the side seams a little so they aren’t as bulky when turned inside out.


4. Turn your stitching inside out. You may want to ease the corners with a chopstick or something similar for a crisper ‘point’ at the corners – be careful, though, so you don’t make holes in the corners (yes, that’s the voice of experience talking from my first attempt years ago!).

5. Now it’s time to stuff with your choice of stuffing material. In this case I’ve chosen Polyfil, and once again I use a chopstick to ease some of the stuffing gently into the corners. The amount of filling you use is down to personal preference – I prefer mine not to be over-stuffed, but firm enough to feel ‘full’.


6. Next you close up the opening in the bottom seam. My preference is to use a ladder stitch, however you can use a whip-stitch if that is easier for you. To do a ladder stitch you just work your way alternatively up each side of the seam, taking a few threads in your needle for each stitch – this looks like the rungs of a ladder when the stitches are loose, and when you pull them tight they close up the seam very cleanly.


7. Now it’s time to make your cording. To do this you’ll need to have quite long pieces of thread, and I used 3 strands of pearl cotton that was supplied with my scissor fob kit. Details of how to make cording yourself can be found in Scissor Fob #1 Tutorial.

8. Firstly you need to fold your cording in half and place a knot at approx 3 1/2″ to 4″ from the end. Of course you may prefer a longer hanger, so feel free to make it as long as you want, just as long as you have enough cord to go around the edges 🙂


9. When we start to attach the cording around the edge of the scissor fob ‘pillow’, I find it easiest to place a pin through the centre of the cord knot and take it down into the pillow at the centre of the top seam. From there I take the cord along the top seam and add two more pins to hold the cord in place temporarily. I start off my thread by poking my needle through the top of the pillow, through the stuffing; pull the needle so the thread just disappears from view under the fabric, then add a few little catch stitches at the back of the knot (because I’m using black thread you can’t see these stitches, if you’re using another colour where the stitching thread shows up, you may want to do your catch stitches underneath the knot out of sight).


Bring your needle to one side of the cord and take a small stitch under the seam – I try to put my needle in about 1 thread away from the seam, and come up approx 1 thread away from the seam on the other side, so it’s less likely to be seen. (I pulled my knot up out of the way to show you the stitches, which pulled my loose tail out, so you need to be careful if you do this yourself!)


Now you take your needle and thread over the top of the cording to the right-hand side once again, and this time put your needle through the fabric just in front of the next twist in the cord. You should use the cord as your guideline here for the length of your stitches – your top thread should follow the ‘furrows’ in the cording and sit neatly in the shape of the cord.

Unfortunately it’s quite difficult to see this with the black thread, so I have use another piece of cord with a contrasting thread as an example so you can see more clearly what I mean …

My cord is a dark colour, so I prefer to use the above method to attach my cording – sometimes, though, if you’ve used a variegated thread, or if your cording is a lighter colour, you may prefer to attach the cord with a small stitch underneath the cord attaching it to the fabric. To do it this way you just need to take your needle through the cord at the bottom the cord:

Then take your needle through the fabric seam underneath the cord, bringing the needle through on a diagonal … then continue the same way until the cord is attached.


Now after that little cording detour, it’s back to finishing off the scissor fob …
At this point you can remove the pins once your stitching is well underway. Continue stitching the cord around the edge, stopping at the centre of the bottom seam.


Now go back up to the top of the cord and do the remaining side the exact same way, and finish off your thread by taking a couple of small stitches into the cord. Once again I ‘bury my thread’ by taking my needle into the pillow and coming up a wee way away and cutting off the thread flush with the pillow fabric … then you just give your pillow a quick squeeze and the end of the tail disappears.


Lucky last, I pop a quick knot at the base of the pillow, and the scissor fob is finished 🙂 If you find your cording is too long, just make another knot at your desired length of each piece of cord, and cut off any extra length not required.

10. All that is left is to attach your fob to your chosen pair of scissors!
I hope you have found the tutorial useful – if you happen to use any of the information I’d love to see your projects where you have used them 🙂
Kindest regards,
Major Happy Dance!!
I can’t believe the time has come when I have FINALLY put the last lot of beads into Enchanted Mermaid! Unfortunately my camera is playing up so I can only use my iPhone at the moment for a photo, and it does her no justice whatsoever … she is without doubt the most blingey cross stitch project I’ve ever worked on. In real life she really sparkles with all the treasures and beads she’s adorned with!

“Enchanted Mermaid” by Mirabilia
Started October 2009 ~ Finished 20 October 2013
Stitched on 28ct hand-dyed Cashel by Picture This Plus ~ colour Fathom
with recommended threads and Mill Hill beads/treasures (squillions of them!)
Next up I continue to stitch as much as I could today on Acorn Hill … this has to be put aside for now while I wait for a replacement thread to arrive. I’ve stitched all the other colours, so I have to wait now for more Brown Sugar to arrive, then it’s just a case of finishing up the lettering which won’t take too long at all 🙂

I think my next BAP focus piece will continue to be TW’s English Garden Sampler. I’m so close to a finish with that one, it doesn’t make sense to stop … although it’s a real challenging piece for me stitching in the evenings, so it’ll continue to be stitched within a semi-rotation with easier projects during the week. It would be nice to get it finished before the end of the year, but I’m not entirely sure that’s do-able now unless I stitch on that solely … which for my sanity just isn’t going to happen!
Then I really need to pull my finger out and get a very overdue wedding sampler started … with any luck they’ll get it before their 10th wedding anniversary!! 😉
