
2014 WIPocalypse, Beading, Canvaswork, Finishing, Flatfold, Framing, Halloween, Judi Utter, Laura J Perin, M Designs, Monsterbubbles, Ruth Schmuff, Stash, Valerie Pfeiffer, Wool embroidery

April & May WIPocalypse

11402901674_5cd19d2dc5_o

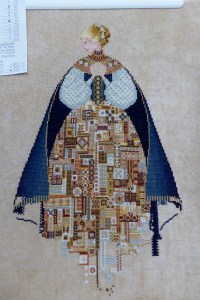
Hmmm, it seems I’m more than a ‘bit’ forgetful these days … it seems even though I was posting to my blog during April I totally forgot all about the official WIPocalypse update post … doh!! April saw a wee bit of stitching, including the completion of Nora Corbett’s Miss Valentine fairy and Blue Bayou by Northern Pine Designs … it also saw a couple of small ornie finishes … so all-in-all probably a reasonable month of stitching.  The ill-fated Flossy has found a happy home with my Mum (the Dragon) … we were going to offer it to a very close family friend, but Mum made me laugh when she said she has it propped up on her computer chair in her bedroom so she can see her all the time and she says goodnight to her every night as she goes to sleep … bless her.  When I mentioned giving it to our dear friend, her response was “she can have it when I’m gone”!  She’s even got plans for how to get her framed, so I’m pleased she loves her so much that at least she will be treasured.  I do have to admit she does look very pretty, even though she is dressed head to toe in candyfloss pink! 😀

Mirabilia (Nora Corbett)-Valentine Fairy

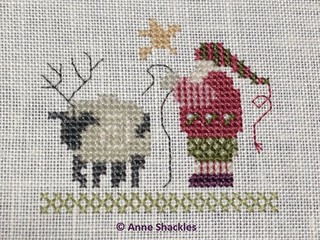
LHN-The Merry Skater

Shepherd's Bush-Joyful Night

Northern Pine Designs-Blue Bayou

When it came to the end of April and then into May, my mojo kind of disappeared a wee bit when I came to the end of my canvaswork rotation and started my “finishing” rotation … for some reason I have to really be in the mood to sit down and do finishing work.  I think part of the problem these days is that I don’t have a dedicated area that I can start items and then leave them to pick up and finish later … with my current flatmate I don’t feel comfortable doing my needlework or finishing in front of him (aside from the fact he comes and puts the TV on as soon as he walks in the room, irrespective of whether I was enjoying the peace and quiet or not in there myself), and I just don’t have the space in my bedroom with all the other junk that is piled up in there …

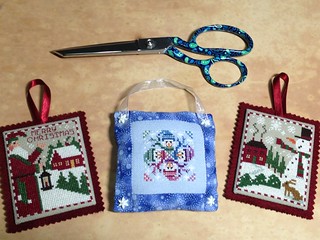
Last weekend, though, I decided “bugger the flatmate” and pulled a small fold-up table into the lounge, did a bit of finishing, then pulled the little table out of the way at the end of the weekend – it was also still there for this last weekend when I did a wee bit more finishing yesterday while he was out (mind you I only did that because I’d figured out he was going to be away for the rest of the weekend and out of my hair!!).  So perhaps I have found a solution for when I come to my finishing rotation again – and in fact I could possibly pull it into my bedroom too on a temporary basis as long as I pull it back out again before sleeping … hmmmm, I like that plan! So, what did I manage to do with my finishing rotation over the last few weeks?  I managed to finish off the following – which really didn’t need that much done to them for them to be 100% finished … First up 3 ornies – these just needed the felt backings and hangers for the Prairie Schooler ones, and the hanger and little snowflake buttons for the Just Nan one

Christmas ornaments

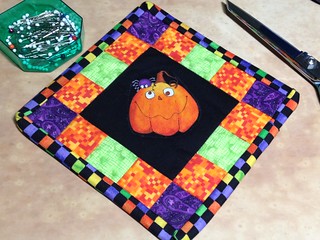
Next up I stitched down the binding on my teeny Halloween quilt … I did a bit of a hash job on the corners, but it’ll have to do …

Quilted mat

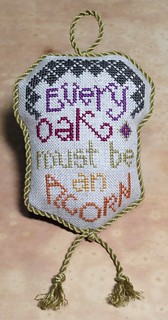
And then my final piece for that particular finishing session was to stitch the cord around the edge of this wee freebie:

Every oak must be an acorn

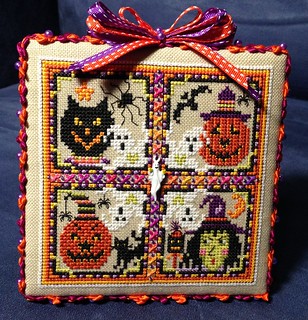
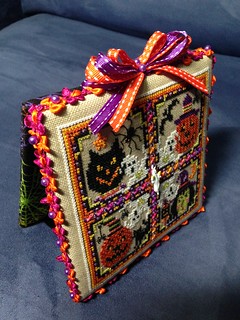
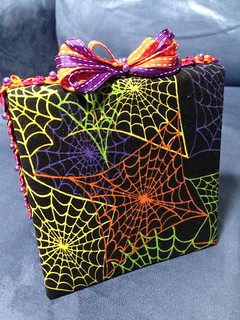
This last weekend just gone I managed to finish off one of my favourite Halloween pieces into a flat-fold … I found a bright trim in my stash along with some bright ribbons, and pretty happy with the way it turned out 🙂

Just Nan-Frightful

Just Nan-Frightful

Just Nan-Frightful

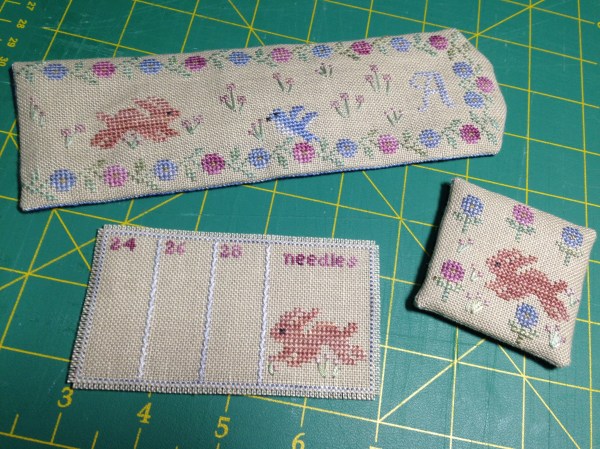
Then I finished off yesterday by trying to finish my Bunnies in the Garden needlework set that I stitched a few years ago … sadly it seems I don’t have the ribbon needed to completely finish it, so I’ve got as far as I can go without it … hopefully I’ll get chance next week to pop into Spotlight and find a silk ribbon that will work (assuming Spotlight still SELL silk ribbon, that is!).  Here is how it stands so far:

IMG_1797

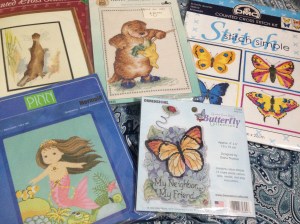
The only stitching I’ve done since the last stitching update is to start a charity quilt block with the theme of butterflies.  I bought about a metre of 14-ct white Aida a few years ago in readiness to do some charity stitching, but with my city commute I just never had the mental or physical energy to do it … now I’m working closer to home I figure it’s time I pull my finger out and get some finished.  What also gave me the final kick in the pants was searching for an old XS kit in my wardrobe and finding a bunch that I’d bought especially to use for charity blocks … so out they came ready to start stitching!  Here are the kits I have in the charity block armoury to work my way through:

IMG_1748

IMG_1749

And here is where I’m at currently for my first butterflies block … once I’ve finished this block it’s time to get back into my formal rotation once again.

IMG_1800

I still have a couple of gifts to complete, but I work better when I’m sticking to my rotation properly so they will just have to find a rotation slot to drop into and work together with my other pieces 🙂 I’ve probably dribbled on enough for now, but before I hit “publish” I’ll finish off with the two WIPocalypse questions for April and May:

April:  How do you keep your stash organised?

Oh my goodness, I don’t know if I could truly say my stash is “organised” per se … although I guess to a certain extent it could be a lot worse!  My problem is that it is scattered all over the place and not all together.  I’m also a lazy git at heart, so often I can’t be bothered putting something away after stitching it (eg threads etc) and I end up with a dumping corner with threads and charts not put away … it’s no wonder I can often not find what I’m looking for when I just “know” I’ve got it “somewhere”!!  On the whole, though, it is kinda organised in a disorganised way …

  • Threads:  On the whole these are all stored in Flossaway baggies in numerical or alphanumeric order and on individual rings according to their brand.  DMC floss is all stored in numerical order in two plastic tubs so they’re easily accessible as I generally use those the most.  Overdyed threads etc are mostly stored alphanumerically by the colour name, but with the thread brands separated on different rings.  For example, I have separate rings for WDW, GAST, Crescent Colours, Needle Necessities/Threadworx etc.  All these threads are housed in a cardboard storage tub that sits in my Ikea ‘bookcase’.  Silks are stored the same way, and pearl cottons and other specialty threads (pearl cottons etc) are stored in another plastic tub.
  • Fabrics:  These are stored by thread count in two Ikea storage drawers – they used to be sorted in colour groups but I quickly gave up on that idea after I’d rummaged around a few times and disrupted it all!  I also have a ‘tub’ of fabrics sitting on top of my DMC that I’ve obviously pulled out at some stage for a project and never been put back …
  • Charts:  Generally these are stored by theme in ringbinders on bookshelves.  Most of these are housed in the kitchenette on my main bookshelves, but most of my favourite designs/smalls charts are in my bedroom on a narrow bookcase.  I have a couple of folders of “to be stitched ASAP”, but I’m trying to focus on those already partially kitted up first (see below).
  • Finishing fabrics/trims:  Truthfully these are all over the place!  Most of my quilting fabrics are in Ikea storage drawers in my wardrobe, with finishing trims etc in a little plastic storage system that has a few pullout drawers. Not ideal, but seems to work OK for now.

My projects themselves are in a whole world of their own where organisation is concerned!  I’ll try to differentiate the different types:

  • WIPs:  My current rotation projects are sitting in their own storage tub with the project on scrollbars/Qsnaps and sitting with their threads/charts etc in a plastic envelope.  That way each project is ready to go immediately when I want to drag it out of the tub.
  • UFOs:  Older WIPs that I haven’t touched for years are sitting in a cardboard storage tub in my Ikea bookcase in my bedroom – these are not stored on scrollbars etc and may/may not have threads with them … they just sit there forlornly at the very bottom of the bookcase feeling unloved …
  • Partial & full kits:  When I was housesitting in Melbourne I went a bit crazy and cut up fabrics for a few tubs worth of projects and put the fabric with the chart … these are now housed in two separate areas – some of these are sitting along with other full kits in two storage drawers in my wardrobe, and the others have all been split into cardboard storage boxes according to their size that will fit with my rotation.  I basically have one box each for “Large/BAPs”, “Medium” and “Small” projects.  I’m trying to work through those items first before kitting up new designs, seeing as the fabric is already committed and cut up ready for stitching!  That seems to work about 95% of the time, but ever now and then a new project seems to leap out of the chart pile demanding to be stitched first!! 😛
  • Canvaswork:  My canvaswork projects are sitting to the left of my Ikea storage bookcase in a shopping bag – these are kitted (or semi-kitted as far as I can for now) with their canvas and threads/charts all ready for when my canvaswork rotation rolls around.  This bag probably makes me drool more than the rest of my storage boxes, if the truth be known!

May:  What designs or themes do you really wish you could find?  What do you think is missing among stitching designs?

Truthfully I can’t say I really have had problems finding a specific type of design … I have, however, had problems finding a specific design that has since gone OOP and hard to locate unless you spend a fortune.  Those are the designs I wish would be more readily available, especially now that PDF downloads are widely available and don’t require a full print-run by a designer.  The other thing I find frustrating is the number of designs only available as kits and not charts, and how many are only available with Aida cloth as the fabric – the fact that I inevitably substitute the fabric in all my kits is not a cost-effective way for me to stitch a design … I really wish that all designs had the option of either having linen in the kit or to just have the chart made available (although I know this would diminish some of the designer’s/distributors’ profits to a certain degree).

The only other thing that has been happening over the last few weeks is something that I can’t talk about yet on my blog, but it threw me for a loop temporarily and my mind has been very very distracted over recent weeks, and I’ve been even more forgetful than ever, if that was even possible!  Hopefully there will be further news sooner rather than later and I can talk about it openly … for now it’s just a case of “wait and see” 🙂

Canvaswork, Finishes, Northern Pine Designs

Blue Bayou finished … and I’m in love with it!!

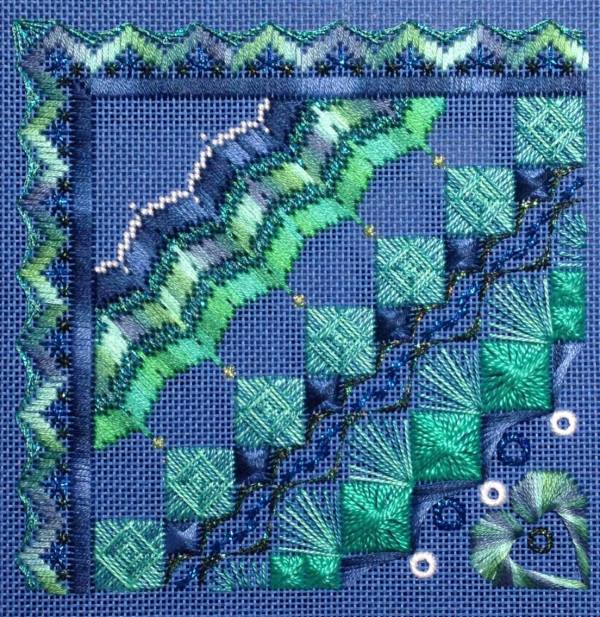
The title says it all … a few days ago I put the final stitches into Blue Bayou, and oh my goodness I am so in love with it, it’s just not funny!!  I ended up substituting DMC 991 pearl cotton for the charted Anchor pearl cotton, as I just couldn’t find it quickly locally, and I was impatient to get it finished!

Northern Pine Designs-Blue Bayou

“Blue Bayou” by Northern Pine Designs
with recommended canvas and threads
Exception: Substituted Anchor pearl cotton with DMC 991 pearl cotton

I still had 1 1/2 hours left of my canvaswork rotation slot, so I immediately put another Northern Pine Designs project on the stretcher bars and made a start on Surf and Sand … much more subtle colours on this one, and a little too much pink for my liking so far, but I’m hoping once the light turquoise blue gets added it’ll balance the colours out a bit more … it’s very pretty so far, though, even with the pink! 😛  I’ve actually stitched half of the next bargello band as well since this photo was taken, but will show more photos later! Surf and Sand

As for the rest of the week, I’m finally starting to feel a bit more ‘normal’ after recuperating at home and being a hermit for a few days.  Today has been spent in the kitchen all day, which means I have a brown rice slice/pie (technically called “Ham Cheese and Leek Pie”) for the freezer for lunches, and a Red Wine, Beef and Mushroom Stew bubbling away in the crockpot for dinners this week … I still have a Pasta, Beef and Mushrooms dish to whip up for the freezer but my feet are killing me thanks to my stupid plantar fasciitis, so I think I’ll call it a day cooking-wise and finish the rest up tomorrow 🙂

And that means for the rest of the day I’m going to settle in and catch up on some more recorded TV in the lounge (thanks to the flatmate being at work), while starting on my next rotation slot … “Finishing”.  Hopefully by the end of the next 5 or 10 hour rotation (whenever I get fed up with it), I’ll have a few more finished items under my belt and out of the finishing pile, even if they’re just ornaments 😀 I also have some comments to respond too as well, which I’ll do shortly 🙂

Canvaswork, Christmas Ornaments, Finishes, Little House Needleworks, Northern Pine Designs, Shepherd's Bush, Works in Progress

Stitching Hermit

The title says it all really … in the last 2-3 days since being home I’ve locked myself away from the world and just stitched my little heart out.  It has really done me the world of good and today I feel a lot more relaxed and back to ‘normal’ again (what ‘normal’ actually is!).

I’ve tried to get back into my rotation slot once again, and it’s done me the world of good to have some sort of discipline again with my stitching – it really helps me to ‘focus’ and I get so much more one than I would normally.  The first rotation slot consisted of Christmas ornaments/freebies, and in my 10 hours I managed to finish 2 ornaments, and almost finish another one (I just had to put it to one side because I can’t find one DMC thread I need to finish it … yep, story of my life!!).  The two that I finished are as follows (I won’t show the other one until I’ve actually finished it!):

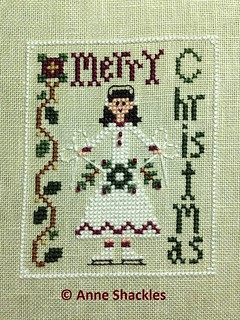
LHN-The Merry Skater
“The Merry Skater” by Little House Needleworks
stitched on 32ct hand-dyed Belfast linen by Countrystitch ~ colour Haystack
with recommended threads, except substituting DMC 712 with 3865
Started 21 Apr 2014 ~ Finished 24 Apr 2014

Shepherd's Bush-Joyful Night
“Joyful Night” by Shepherd’s Bush
from the 1998 JCS Christmas Ornament issue
stitched on 32ct Lambswool Wichelt linen
with recommended threads, except substituting DMC Ecru with 3865
Note: the chart called for pink DMC for the sheep swirl, which seemed to be an error,
so I replaced with DMC 3865
Started 24 Apr 2014 ~ Finished 25 Apr 2014

Then I moved on to my Canvaswork rotation slot … the last time I started this one (Blue Bayou by Northern Pine Designs) I found the WDW pearl cotton that was supposed to be PC#8 was actually PC#5 (it was mislabelled), and it really showed up with my stitching … so my first job yesterday was to unpick the original pearl cotton stitching … which ended up being a challenge in itself!  Because the waffle stitch has so few threads on the back to weave into, I’d managed to thread through a few stitches adjoining it, and it ended up being such a tangled mess trying to unpick I just ended up frogging those as well … which left me with 3 very small bands of metallic threads left.  Once I started stitching, though, I set the stopwatch going and really got into the rhythm of this one.  It’s one of those projects when you wake up in the morning and turn over to see your stitching on your stitching stand and it makes your spirits soar straightaway!

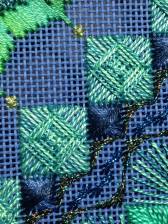
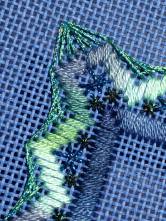
Unfortunately, though, I hadn’t realised I didn’t have one of the pearl cottons for this design, so I’m a bit stalled now … I originally hadn’t worried too much knowing that I should be able to get pearl cottons locally, until I realised last night that it’s actually an Anchor pearl cotton that I need.  I’ve decided, though, to just try and get a DMC equivalent as I really don’t think it’ll make that much of a difference.  Today I’m going to head out to my local Spotlight to see if they have what I need (although truthfully don’t hold out much hope!!).  If not, I’ll just start up a different canvaswork piece to start work on for the remaining 3 hours of my rotation instead.  Here is how Blue Bayou looks right now, along with some close-ups of those amazing stitches in it so far:

793857_10152061870498148_4708685548147934195_o

      10259281_10152061860233148_3177921765632503592_o 857525_10152061861018148_8082385855990300010_o 10271293_10152061859123148_4914348800036493040_o

Finishes, Hardanger, Victoria Sampler

UFO no longer … Ecstatic Happy Dance!!!

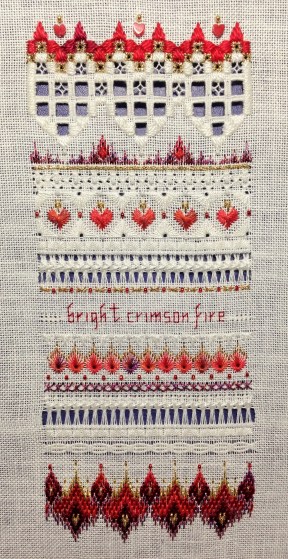
I finally plucked up the courage to just “do it” and finish the hardanger band at the top of my Crimson Fire Sampler.  I wouldn’t go to sleep last night until I’d put the very last stitches into this piece, and just managed to put the last ones it before midnight … I’m so thrilled with this one, it’s not funny!  My lack of confidence saw this end up as a UFO for 3 years … crazy, because I used to be an incredibly confident stitcher and my learning knew no bounds.  Not sure what happened really over recent years, so it felt amazingly good to prove to myself that I really can still do new things, and to ignore my inner voice in the future!!  Anyway, this is finish #3 of the year, and definitely the finish I’m most proud of since finishing off my Enchanted Mermaid last year!

"Crimson Fire Sampler" by The Victoria Sampler Stitched on 28ct white Cashel linen with recommended threads and beads Started Jan 2011 - Finished 28 Jan 2014
“Crimson Fire Sampler” by The Victoria Sampler
Stitched on 28ct white Cashel linen
with recommended threads and beads
Started Jan 2011 – Finished 28 Jan 2014

Now I’m back to my “small projects” rotation slot to finish off the last 5 hours … but I won’t be stitching until midnight this time round and happy to stagger that one over a few nights! 😉

Christmas Ornaments, Finishes, Hardanger, M Designs, Victoria Sampler, Works in Progress

2nd Finish for 2014

In readiness for completing the hardanger band on my Crimson Fire Sampler, I decided it would be wise to do a ‘refresher course’ on hardanger first, seeing it’s been so many years since I did my actual beginners class!  I rummaged through my ‘small project’ rotation filing box and managed to find the appropriate Beyond Cross Stitch kit by The Victoria Sampler.  Added to that I also dragged out the book by Janice Love called “Hardanger Basics and Beyond” for some extra clear photos and descriptions.  This book is without a doubt an absolute god-send for the basics of hardanger!!

Anyway, I finally put needle to fabric, and managed to start and finish this little sweetie in a day (4 1/4 hours of stitching to be exact … gotta love the stopwatch function and a timed rotation!!).  My woven bars aren’t perfect, as I still need to work on my tension a tiny bit … but overall after not doing hardanger woven bars for about 20 years I can’t complain really, and I’m pretty chuffed with it!

Victoria Sampler-Christmas Heart Beyond XS 5-3
“Beyond XS 5-3 Christmas Heart” by The Victoria Sampler
Stitched on 25ct white Lugana
with kit threads and beads
Started 26 Jan 2014 – Finished 26 Jan 2014

I was getting a bit tired by the end of the day, so I opted not to do any more hardanger last night, but instead did an hour on another “small project” for my rotation slot … leaving me with another 5 hours to go.  This is the ‘pale colourway’ of the Thistle Needlerolls by M Designs (I stitched the vibrant colourway before Christmas).

"Thistle Needleroll (pale colourway)" by M Designs Started 26 Jan 2014
“Thistle Needleroll (pale colourway)” by M Designs
Started 26 Jan 2014

I forgot that I’d meant to stitch up Lizzie*Kate’s Cross Stitcher in Residence in my small project rotation slot this time round, so the poor old needleroll may end up looking like that until the next rotation.  I have to say I wasn’t enjoying stitching it last night, so that’s not necessarily a bad thing!!

Christmas Ornaments, Cross Stitch, Dragon Dreams, Elizabeth's Designs, Finishes, Freebies, Glory Bee, JBW Designs, Little House Needleworks, Works in Progress

Last finishes for 2013, and Christmas at home

First of all I should say a rip-roaring and resounding “HAPPY NEW YEAR!!!” to everyone … as we kick off a new year with the first day of 2014.  I know I’m not the only one that had some struggles in 2013, so personally I’m certainly not sorry to see it finish!  Let’s hope that 2014 is a brighter year for everyone who had a crappy 2013, and that it continues on a positive vein for those who had an awesome 2013 🙂

Happy-New-Year-Images2

I just returned home this morning from two weeks holiday with my parents in New Zealand.  I say “holiday”, but in truth it’s never really a holiday when I go home … there’s usually a list of chores that my folks want me to complete … and I have to admit I’m generally really happy to help out as much as I can when I go home.  This year the chore was to take Dad out to buy a new mobile phone … and teach him how to use it … the first part was pretty simple, and the second part saw me practising “patience” substantially, let’s say! LOL.  Then we went out to buy a Panasonic digital recorder (DVR) for both Mum and Dad and set it all up for them in their respective rooms.  Sadly Mum’s was a real challenge due to not having a good aerial set-up, so unfortunately they’ll need to call in someone to add a new aerial on the roof for Mum so she can get it working 100%.

Dad has to drink something similar to protein shakes daily, and he’s been really bad at drinking them – he told me he’d missed one whole day because Mum was sick and she couldn’t make them for him … my response was that he shouldn’t have to wait for Mum to do everything for him, why couldn’t he just make them himself?  He shouldn’t have to rely on Mum for everything, if she got sick then he’d be stuffed!  You could have knocked me over with a feather the next day when Mum told me Dad has asked her to teach him how to make his shakes … and that he needs to be more “independent”.  I didn’t expect my little chat to have such a big impact … but I got a HUGE resounding vote of thanks from Mum, as that’s helped to relieve some of the pressure from her every day having to do everything for Mum (and I know it’s been getting her down).  I hadn’t expected him to do that, but it’s a very good thing, I think!

While I was in NZ I managed to meet a dear online/blogging pal that I hadn’t managed to meet before.  Zeb had chatted to me briefly just after I moved to Aussie to live, wishing she knew stitchers in the local area to have GTGs etc … it seems all these years later there is now an active group of stitchers in Auckland that meet up, and we managed to ‘gate-crash’ the party for an afternoon!  I’d called out to the Auckland stitchers to see if anyone was interested in getting together while I was in NZ, and Zeb arranged a stitching day at The Ribbon Rose – what a perfect choice for the venue!!!  Not only did we (Mum and I, ‘cos I dragged her along for a change in scenery and a different group of people to chat to to give her a break) get to meet some lovely people on the day, but we managed to kill two birds with one stone by completing a small stash enhancement onsite.  I always drag Mum into The Ribbon Rose each trip, so it was extra special this time!  I managed to get a group photo in the afternoon, but unfortunately a few of the group disappeared and left while Mum and I were browsing around the store, so the photo doesn’t include everyone that was there 😦  (UPDATED: Photo now removed by request of someone in it.)


Now we’re back onto the subject of stitching, I did manage to get quite a lot of stitching done while I was away – mainly because we couldn’t really go far from home because of Dad, and I made it a priority to do ‘the family thing’ while we could.  Dad still has to have two surgeries yet in 2014, and as awful as it sounds I wanted to spend as much time as I could while I could … obviously we all have positive thoughts that he’ll come through the surgeries just fine, but I don’t want to have any regrets if it doesn’t …

Anyway, back to the stitching again … these are the little pieces that I started and finished while I’ve been away – I think I impressed myself which the stitching progress this time round!!  Admittedly two days sat in front of the TV in Mum’s room watching Catherine Cookson DVDs really helped … while I’m generally very very patient, and wanted to spend as much time with Dad as I could, we still needed to have a wee break just for sanity’s sake!!  Dad has a tendency to make comments that are less than positive and can be quite derogative, so I needed to recharge my little positivity bubble for a couple of days …

DSCN0434

“Never Too Big” by Dragon Dreams (2004 JCS ornie issue)
stitched with recommended DMC and Kreinik threads and JABC button
on 28ct light taupe linen (sorry, didn’t write the details down when I kitted it up!)

DSCN0432

“Full Moon” freebie by Elizabeth’s Designs
stitched on 32ct hand-dyed Lugana by Countrystitch ~ colour Little Boy Blue??
with recommended DMC and WDW threads
(really love those little sheepies, even if they don’t have legs! LOL)

DSCN0438

“Seasons Greetings” by Glory Bee (2005 JCS ornie issue)
stitched on 28ct natural linen
with my choice of threads:
Lettering in Crescent Colours Cupid, Kreinik #4 braid for the star (#002),
DMC for the rest – white, 502 or 503 (can’t remember) and 500

DSCN0439

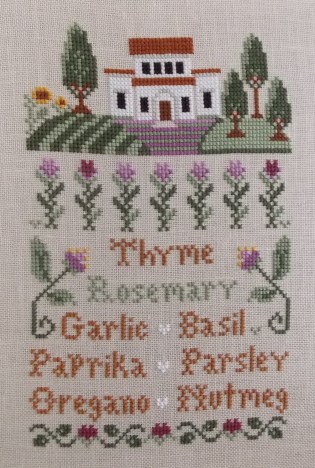
“Gourmet Garden” by Little House Needleworks
stitched on 32ct hand-dyed linen by Countrystitch ~ colour Pipi
with recommended DMC threads

I did start one last project that I hoped to see finished by the end of 2013, but it just wasn’t to be … this one will only take an hour or two of love and it’ll be finished, so it’s likely to be my first finish for 2014.  I really did want to start my rotation tomorrow, though, so I’ll have to make a decision whether to finish this one off now, or to wait until the “small projects” section of my rotation … I’m pretty sure I know what will win out tomorrow! 😛

DSCN0440

Just have the holly leaves and lettering to go on this one before there is another “F word” … “Finish”

And on that note I’d better call it a night, I think … I managed to pick up a few healthy groceries in readiness for one of my New Year’s Resolutions, that to be healthier and happier.  Hopefully all the salads will offset the half a suitcase full of chocolate goodies and Gingernut biscuits that Mum sent me home with! haha.

As to the rest of my New Year’s Resolutions and stitching plans/goals for 2014, well I guess that’ll have to come later once I’ve made some decisions … watch this space … just maybe not for a wee while 😛

Canvaswork

Canvaswork Dreams

After finishing my Ebb Tide canvaswork piece, I have a major urge to get more canvaswork pieces kitted up and ready to go … I’ve been slowly adding to my thread stash for a number of years now, and it seems I finally have enough in my stash to finally kit a number of pieces up (including more Rainbow Gallery thread stash that arrived this morning from a recent sale). The problem I will have, though, is that I don’t have enough canvas in my stash … will have to do a hunt under the bed for my canvas stash and see what I’ve got sitting around … but sadly not very much I don’t think. Canvas is like hen’s teeth to find ‘down under’, so I always have to order from Nordic Needle (or I used to buy from Nancy’s in Wellington, New Zealand). Looks like a New Year stash purchase may be in order, although I’d better make it a decent one as postage for canvas always bumps the price up astronomically, even though it doesn’t weigh very much it usually ends up being sent in a big box, pffft.  I guess it will mean giving me an incentive to order the remaining threads I need for some other canvaswork projects at the same time … sadly threads like Rainbow Gallery are also like hen’s teeth to order down under!!

Anyway, on close inspection of my thread stash inventory on the PC (assuming it’s correct!), it seems I should have all the threads for the following designs, so the biggest problem I’m going to have is actually DECIDING, ‘cos there are actually a lot more now than I realised!!  WOOHOO!!!!! 😀

Laura J Perin-Flying GeeseFlying Geese by Laura J Perin

Laura J Perin-Holly and IvyHolly and Ivy by Laura J Perin (freebie)
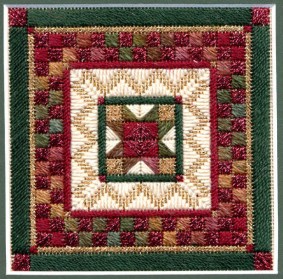
Laura J Perin-Holiday SquareHoliday Square by Laura J Perin (freebie)
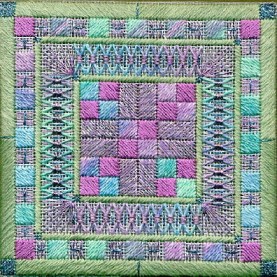
Laura J Perin-SpringFling400Spring Fling by Laura J Perin (freebie)

BlueBird200Blue Birds by Laura J Perin (freebie)

Jens Jems-Polynesian Paradise_0001 - CopyPolynesian Paradise by Jen’s Jems (I have the black canvas ready)
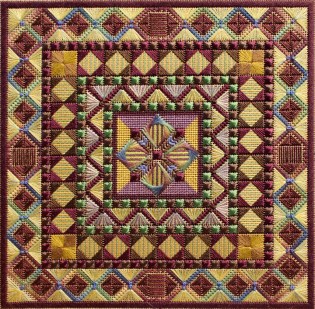
GRACE-LG11Grace by Orna Willis (except I want to do the purple colourway)
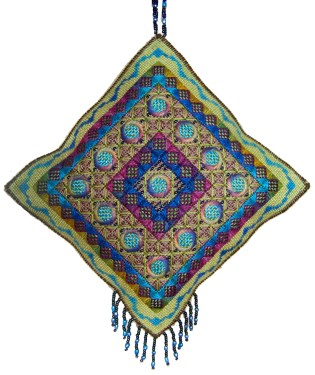
summerdrinkgreenlarge1A Summer Drink by Orna Willis (I want to stitch both the Lime and Mint/blue versions)

Laura J Perin-Reflecting Pools1Reflecting Pools by Laura J Perin

Northern Pine-Blue Bayou Blue Bayou by Northern Pine Designs (I have the blue canvas cut and ready to go)

1890744Mallard Collage by Laura J Perin

Northern Pine-Earth Spirit_0001Earth Spirit by Northern Pine Designs

Northern Pine-Surf & Sand_0001Surf and Sand by Northern Pine Designs

If you’re interested in getting started with canvaswork yourself, the following are some of my favourite websites for drooling and building up the wishlist:

A couple of additional links for designers, although I haven’t tried any of their designs yet:

Canvaswork, Crazy January 2013 Challenge, Finishes, Little House Needleworks, Northern Pine Designs

Not one but TWO finishes!

I lived up to my word and poor old Flossy (well, she’s a babe really, to say she’s only been around for a week or two!) has been put on the shelf for now … the urge got to me yesterday and I spent the afternoon catching up on recorded TV while finishing off two of my WIPs I mentioned in my last post.

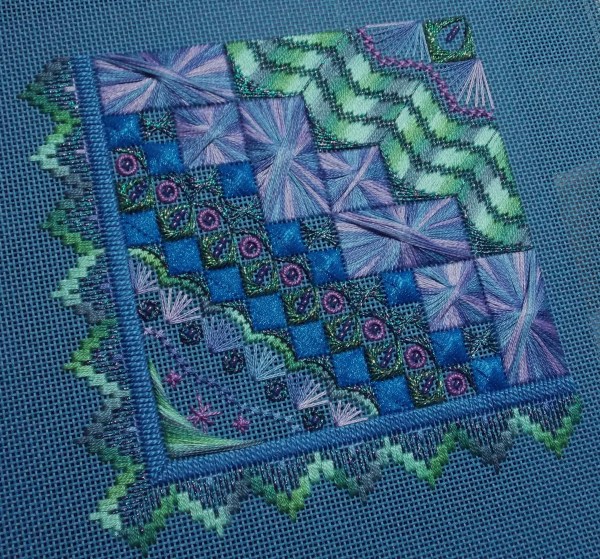
First up is Ebb Tide by Northern Pine Designs.  Oh boy, this was a fun design to stitch!  I can’t say I’ll be in a hurry to stitch with Rachel thread again, but once I got clever and used some nail polish across the top of the thread where I cut it, it was a lot easier to use!  It’s the first time I’ve ever done Jessica stitches, and they’re really quite cute, and easy to do once you get the hang of them!  I did them slightly differently to how the instructions told you to do them, as I’d seen them done on some other needlepoint blogs … by tucking the last two stitches inside and underneath the previous stitches, so they sit perfectly.  All-in-all I’m thrilled this one is finally finished … and I spent no time at all popping the next Northern Pine design onto the bars to start a new one!

DSCN0423

“Ebb Tide” by Northern Pine Designs
stitched on Leventeen Blue canvas
with recommended threads

DSCN0418

While I was trying to take a photo last night my camera was struggling a bit to focus … imagine my delight at the colours showing on the viewing screen when it will still a blur … it made me smile so I captured the image! 🙂

DSCN0417

Here is the next design ready for starting … just need to find a couple of the missing threads (geez I hope I actually have bought these ones, otherwise I guess it won’t be started soon! LOL).  If not, I’ll just have to find another canvaswork design to throw onto some bars … I think I always need to have a piece of canvaswork ready to go at a moment’s notice, it gives me such pleasure! 🙂

DSCN0425

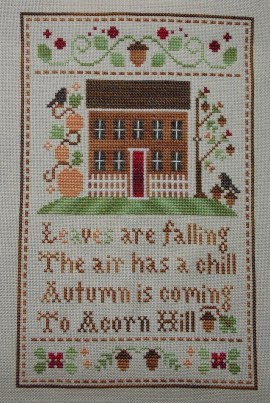
Then I decided to put the final stitches into LHN’s Acorn Hill – it didn’t take too long at all to pop the final words into place, and it became my second finish yesterday evening.

DSCN0427

“Acorn Hill” by Little House Needleworks
stitched on 28ct antique ivory coloured Jobelan 
with recommended Crescent Colours cotton floss

After that I decided to go back to old Flossy, and managed to put a few more stitches into the top wings – I didn’t bother taking a progress piccie as there wasn’t really too much to show … perhaps the next time you see her she will be finished … or maybe not … LOL.

Finishes, Freebies, Lizzie Kate

A few small finishes

Not much housework was done over the last weekend … instead I spent the weekend stitching a few small freebie designs, and a wee spot of baking on Sunday.  I’d been doing a bit of baking recently – Red Velvet Cupcakes last Monday to welcome my colleague back to work (and to celebrate being able to go back to a single person’s workload once again!).  Then I found out the same colleague has his birthday on Halloween, so I spent a few mid-week cooking hours in the kitchen making two fruit flans.  After this week’s delicious baking attempts I’ve now been officially dubbed “Team Chef” … but not entirely sure I want that title!! LOL.

Last week I also managed to stitch a small chart I’ve had kitted up for a long time:

DSCN0365

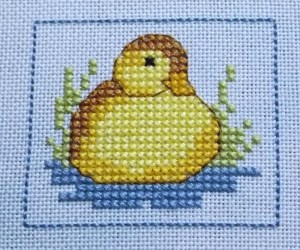
“Duckling” freebie by Lesley Teare
(was on http://www.cross-stitching.com, but no longer there sorry!)

stitched on 28ct hand-dyed ‘sky’ Jobelan
with recommended DMC threads

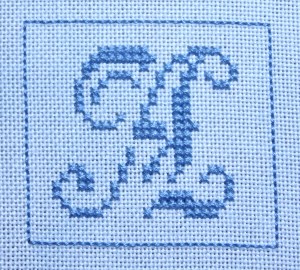
Then this weekend I decided to stitch a letter “A” on the same fabric to use as a backing for a scissor fob:

DSCN0369

Freebie chart from an old french Sajou chart (Sajou 361) – chart still available here
stitched on 28ct hand-dyed ‘Sky’ Jobelan
with DMC floss

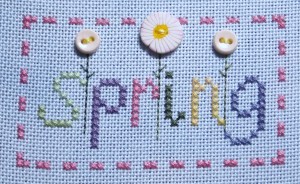
The other freebie stitching I managed to finish was as follows:

DSCN0368

“Spring” freebie by Lindy Lane Designs
(sadly it seems they are no longer in business, so I can’t provide a link to this one)
stitched on 28ct hand-dyed ‘sky’ Jobelan

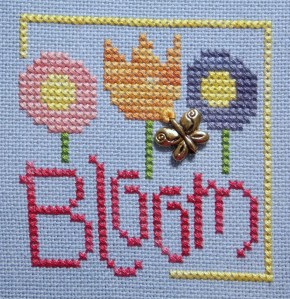
DSCN0371

“Bloom” freebie by Lizzie*Kate
Chart still available here (scroll down to the middle of the page)
stitched on 28ct hand-dyed Lugana (not sure by who, it’s a VERY tight weave!!)
with recommended GAST/WDW threads, with the exception of Harvest Moon
(I subbed with a Ltd Edition GAST thread)

As for what’s next?  I need to do one more scissor fob tutorial quite quickly to help out a fellow stitcher with a specific finishing method … otherwise I just might have to pick up a new start!  My latest order is on its way from 123stitch, which means my replacement thread for LHN’s Acorn Hill is on it’s way – I figure I can probably sneak in one more new start/finish before it arrives and I ‘have to’ concentrate on my WIP … haha, first time I’ve said that, that’s for sure!! 😛


Finishing, Focus on Finishing, Tutorials

Scissor Fob Tutorial #3 (with whip-stitch edging)

This tutorial is the next in my list of the many ways you can finish a scissor fob. The whip-stitched edge is one of the most versatile ways to attach two stitched pieces of fabric together, and is the perfect stitch for finishing scissor fobs. The next tutorial will include a beaded edge and tassel … so watch this space for that one … and in the meantime I hope you find the below tutorial of use. As always if there is something that is unclear or you have any questions don’t hesitate to scream out!

Scissor Fob with whip-stitch edging

DSCN0404

You will need:

  • Stitching (identical size front and back)
  • Cording or ribbon for the hanger
  • Matching cotton floss for the whip-stitching
  • Your choice of filling (eg polyfil, teddy bear pellets, etc)

1. Firstly you need a back-stitched line of stitching outside your stitched pieces, both front and back. The stitching must be identical in size on both the pieces, so make sure you count very very carefully, or your sides won’t match when you whip-stitch the sides together. In most cases I stitch approx 2 stitches away from my main stitching (ie 4 threads away on linen and 2 squares away on aida fabric).

DSCN0372

2. Cut away the excess fabric from each piece, leaving approx 3/4 to 1cm seam allowance.

DSCN0373

3. At this point I realised I hadn’t yet made myself a piece of cord, so I nipped off to quickly put a piece of cord together … see the previous tutorial for making your own cord. Alternatively you can use a piece of ribbon with the ends knotted together in the same way as the cord below.

DSCN0374

4. Now we need to turn over the seam allowance of your stitched pieces. First of all I fold over the corners right at the hole of the corner stitches of the back-stitched line.

DSCN0375

Then fold over the seam itself along the back-stitched line of stitches.

DSCN0377

DSCN0378

Continue all the way around until all the edges are folded over. You may prefer to hold down the seams with a pin – if you do this, though, don’t forget to pin it from the right side so you don’t accidentally stitch your pins on the inside of the fob!

DSCN0381

DSCN0382

DSCN0383

5. Now we start to back-stitch around the fob and stitch the front and back pieces together. I usually use 2 strands of cotton floss for my edges. Note that I have used a contrasting thread here so that the stitches show up more clearly – you can choose to do this if you want to have a contrast of the threads, but normally I prefer to use a complimentary thread colour to the fob, and usually use the same colour for the back-stitched seam lines and for the whip-stitching.

Start by coming up with your needle in the corner hole of one of the back-stitched lines.  I usually cheat and use a small knot to anchor my thread in the seam allowance.

DSCN0387

DSCN0389

Then take your needle under one of the back-stitches – start with the first stitch on each side.

DSCN0391

And continue to take it under the stitch that is directly opposite on the other piece of fabric (once again the first stitch on that side of the fabric).

DSCN0392

Then come back to the first piece of fabric, and take your needle under the next stitch and once again underneath the stitch directly opposite.

DSCN0393

DSCN0394

You continue this way until you come to a point where you want to attach your fob hanger. In this case I could have made my fob to hang in a diamond shape, or in a square shape … I ended up deciding on the square shape this time round.

DSCN0385

DSCN0386

To do this I continued whip-stitching the seam until I almost came to the half-way point across one of the sides – then I inserted the knot of the cord into the seam.

DSCN0395

DSCN0396

DSCN0397

Continue to whip-stitch through each side of stitches, but for the next two stitches you’ll need to pass your needle through the centre of the cord as you stitch – this will ensure that your cord doesn’t come free and helps to cement it neatly in place.

DSCN0398

DSCN0399

6. Continue to whip-stitch all the way around 3 of the sides, then leave a small opening on the 4th side so you can insert the filling of your choice. In my case I’ve used my favourite choice, teddy bear pellets.  (You will see that I’ve now started using the ‘proper’ coloured thread now to complete the finishing.)

DSCN0400

Once you have filled to your desired level, continue to finish off the remaining stitches.

DSCN0402

Finish off your thread at the end, and voila, your fob is all finished!!

DSCN0403

I hope you enjoyed the latest tutorial – thanks again for your previous comments on the other tutorials, it helps the motivation to keep doing more! 🙂