Christmas Ornaments, Mirabilia, Mum's stitching, Works in Progress

Miss Valentine, aka “Flossy”

I don’t know what possessed me … I purchased Miss Valentine by Mirabilia when I truly dislike the colour pink.  Her dress on the cover picture looks extremely pale, with just a hint of pink really, so for some reason she appeals to me.  Even though she’s not my usual choice, I thought she was lovely, truly delightful … until I started stitching her this week.  I feel like I’ve just pushed myself through the gates of hell … stitching hell …  OK, perhaps an exaggeration, but I seriously didn’t expect the vomit-inspiring candy floss pink to be the main colour of her dress … I’m hoping like heck that when the other colours are added that the colour will tone down somewhat!  The way I’m looking at her now is that she may just end up on Etsy or something at the end of all this!!  Poor Flossy, I do hope she tones down a little bit … I guess the alternative is that I just suck it up and unpick what I’ve done and do an entire colour conversion … which I suppose is kind of early enough to do this … or to finish her off and put her up for sale on Etsy … or gift her to a dear stitching friend when it’s finished … oh decisions decisions, what to do!  Poor old Flossy, I don’t mean to be so cruel to her, but she’s … well … she’s just not “blue”!!  Or lilac … Or frankly any other colour that’s not putrid, poxy, candy floss pink … !!

DSCN0405

After my little whinge, I’ll brighten up a bit to share what I did two weekends ago, and hadn’t realised that I haven’t shared yet.  While getting the scissor fob tutorials ready, and making up cording for the tutorial, I also dragged out a few pieces that are half-finished but just waiting for cording to be done and had a major cord-making session.  I now have a bunch of ornaments etc that have cording all ready to go … but, um, yeah, they’re still sitting in the finishing pile the same as they were before {{cough}}.  But they have cording now, so that’s closer to being finished than before, right?

DSCN0332

I also managed to sit up one evening and quickly completed the ladder stitch closures on this bunch of ornaments.  Some of these were stitched by my Mum and I did the finishing of them all.  Not entirely sure I’ll bother putting up the Christmas tree this year seeing as I won’t be here, and I don’t spend any time in the lounge any more with the flatmate taking it over, so they may not see the light of day until next year … but at least they’re finally out of the finishing pile and into the ornie box!

Here are Mum’s ornaments:

DSCN0308

DSCN0306

DSCN0304

And mine:

DSCN0307

DSCN0303

Finishes, Freebies, Lizzie Kate

A few small finishes

Not much housework was done over the last weekend … instead I spent the weekend stitching a few small freebie designs, and a wee spot of baking on Sunday.  I’d been doing a bit of baking recently – Red Velvet Cupcakes last Monday to welcome my colleague back to work (and to celebrate being able to go back to a single person’s workload once again!).  Then I found out the same colleague has his birthday on Halloween, so I spent a few mid-week cooking hours in the kitchen making two fruit flans.  After this week’s delicious baking attempts I’ve now been officially dubbed “Team Chef” … but not entirely sure I want that title!! LOL.

Last week I also managed to stitch a small chart I’ve had kitted up for a long time:

DSCN0365

“Duckling” freebie by Lesley Teare
(was on http://www.cross-stitching.com, but no longer there sorry!)

stitched on 28ct hand-dyed ‘sky’ Jobelan
with recommended DMC threads

Then this weekend I decided to stitch a letter “A” on the same fabric to use as a backing for a scissor fob:

DSCN0369

Freebie chart from an old french Sajou chart (Sajou 361) – chart still available here
stitched on 28ct hand-dyed ‘Sky’ Jobelan
with DMC floss

The other freebie stitching I managed to finish was as follows:

DSCN0368

“Spring” freebie by Lindy Lane Designs
(sadly it seems they are no longer in business, so I can’t provide a link to this one)
stitched on 28ct hand-dyed ‘sky’ Jobelan

DSCN0371

“Bloom” freebie by Lizzie*Kate
Chart still available here (scroll down to the middle of the page)
stitched on 28ct hand-dyed Lugana (not sure by who, it’s a VERY tight weave!!)
with recommended GAST/WDW threads, with the exception of Harvest Moon
(I subbed with a Ltd Edition GAST thread)

As for what’s next?  I need to do one more scissor fob tutorial quite quickly to help out a fellow stitcher with a specific finishing method … otherwise I just might have to pick up a new start!  My latest order is on its way from 123stitch, which means my replacement thread for LHN’s Acorn Hill is on it’s way – I figure I can probably sneak in one more new start/finish before it arrives and I ‘have to’ concentrate on my WIP … haha, first time I’ve said that, that’s for sure!! 😛


Cross Stitch, Enchanted Mermaid, Finishes, Little House Needleworks, Mirabilia, Works in Progress

Major Happy Dance!!

I can’t believe the time has come when I have FINALLY put the last lot of beads into Enchanted Mermaid!  Unfortunately my camera is playing up so I can only use my iPhone at the moment for a photo, and it does her no justice whatsoever … she is without doubt the most blingey cross stitch project I’ve ever worked on.  In real life she really sparkles with all the treasures and beads she’s adorned with!

1398697_10151698500223148_1516213697_o (1)

“Enchanted Mermaid” by Mirabilia
Started October 2009 ~ Finished 20 October 2013
Stitched on 28ct hand-dyed Cashel by Picture This Plus ~ colour Fathom
with recommended threads and Mill Hill beads/treasures (squillions of them!)

Next up I continue to stitch as much as I could today on Acorn Hill … this has to be put aside for now while I wait for a replacement thread to arrive.  I’ve stitched all the other colours, so I have to wait now for more Brown Sugar to arrive, then it’s just a case of finishing up the lettering which won’t take too long at all 🙂

1403700_10151699598123148_1694795760_o (1)

I think my next BAP focus piece will continue to be TW’s English Garden Sampler.  I’m so close to a finish with that one, it doesn’t make sense to stop … although it’s a real challenging piece for me stitching in the evenings, so it’ll continue to be stitched within a semi-rotation with easier projects during the week.  It would be nice to get it finished before the end of the year, but I’m not entirely sure that’s do-able now unless I stitch on that solely … which for my sanity just isn’t going to happen!

Then I really need to pull my finger out and get a very overdue wedding sampler started … with any luck they’ll get it before their 10th wedding anniversary!! 😉

Finishing, Scissor Fobs, Shepherd's Bush, Stitching Smalls, The Drawn Thread

Preview of the next tutorial

Yesterday I had a mini finishing spree where I did all the photos needed (almost all anyway!) for two scissor fob tutorials.  As you can see from my previous post I managed to complete one of them and have it published … I want to take some more photos before I publish the second one, though, so the cord attachment is more clear.  In the meantime, however, I can share my two finishes from yesterday – so you have a preview of which fob finishing method is coming next … 😉

P1080012

It’s felt really good doing the tutorials once again … perhaps my finishing funk is slowly disappearing and a wee bit of mojo is returning? … I really do hope so! 😀


Cross Stitch, Finished Items, Finishing, Focus on Finishing, Scissor Fobs, Stitching Smalls, The Drawn Thread, Tutorials

Stitching Tutorial #1

I have just published the following tutorial in my Focus on Finishing blog, but thought I’d include it here as well …

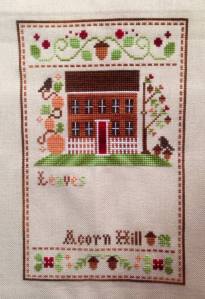
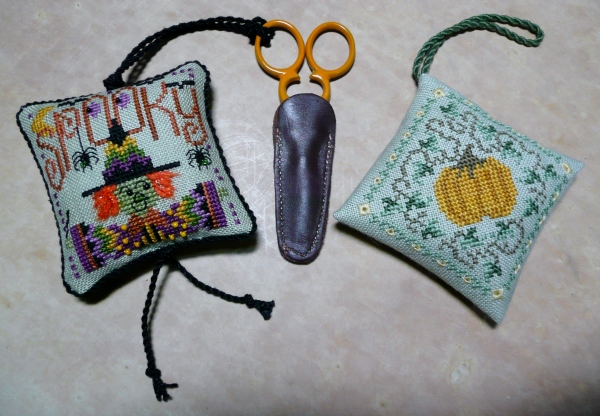
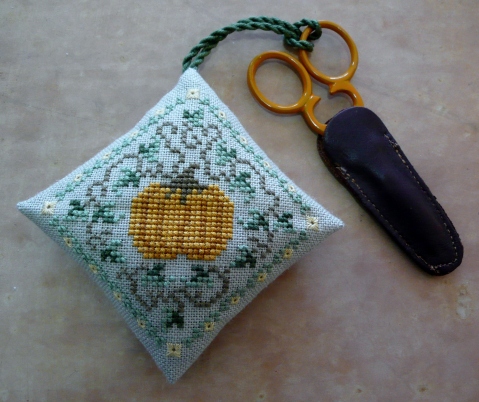
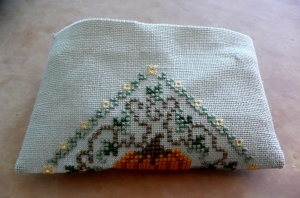
This is the first of a number of upcoming Scissor Fob tutorials … and is the type of finishing used by The Drawn Thread freebie designs and similar to Mill Hill treasure ornament series.  The finish is a diamond shape, which I think is really attractive for a scissor fob.  This one in my tutorial is a bit large for a scissor fob, in my opinion, but the finishing is the same irrespective of the design size you choose 🙂  If you are interested, this is Pumpkin Keeper freebie by The Drawn Thread.

P1060957

Materials needed:

  • Stitched project – this needs to be a square design, preferably stitched in a diamond shape
  • DMC thread or sewing machine thread to match the stitching fabric (and contrasting sewing machine thread for basting, if desired)
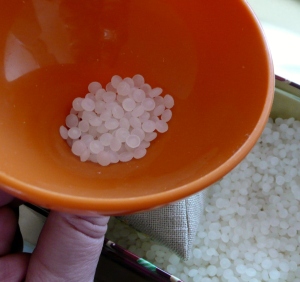
  • Stuffing (your preferred choice, can be Polyfil, crushed walnut shells, or teddy bear pellets, for example)
  • DMC for cording, or ready-made cord
  • Pencil or cording drill

1.  Ensure you have equal sides on your stitching – the easiest way to do this is to count the number of squares away from each of your piece if stitched on aida, or count a specified number of threads away from each side when stitching on linen.  In this case I followed the Drawn Thread instructions, which was to count out 24 threads away from the stitched area and cut off the fabric edges.  I find the easiest way to do this is to count out your designated number of threads then remove the next thread, ie pull it all the way out – this leaves a clean channel for cutting a straight line following the weave of the linen, as you can see in the photo below.

P1040636

P1040636

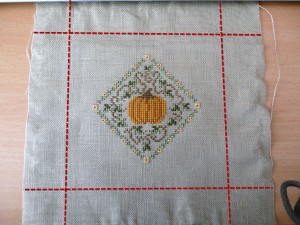
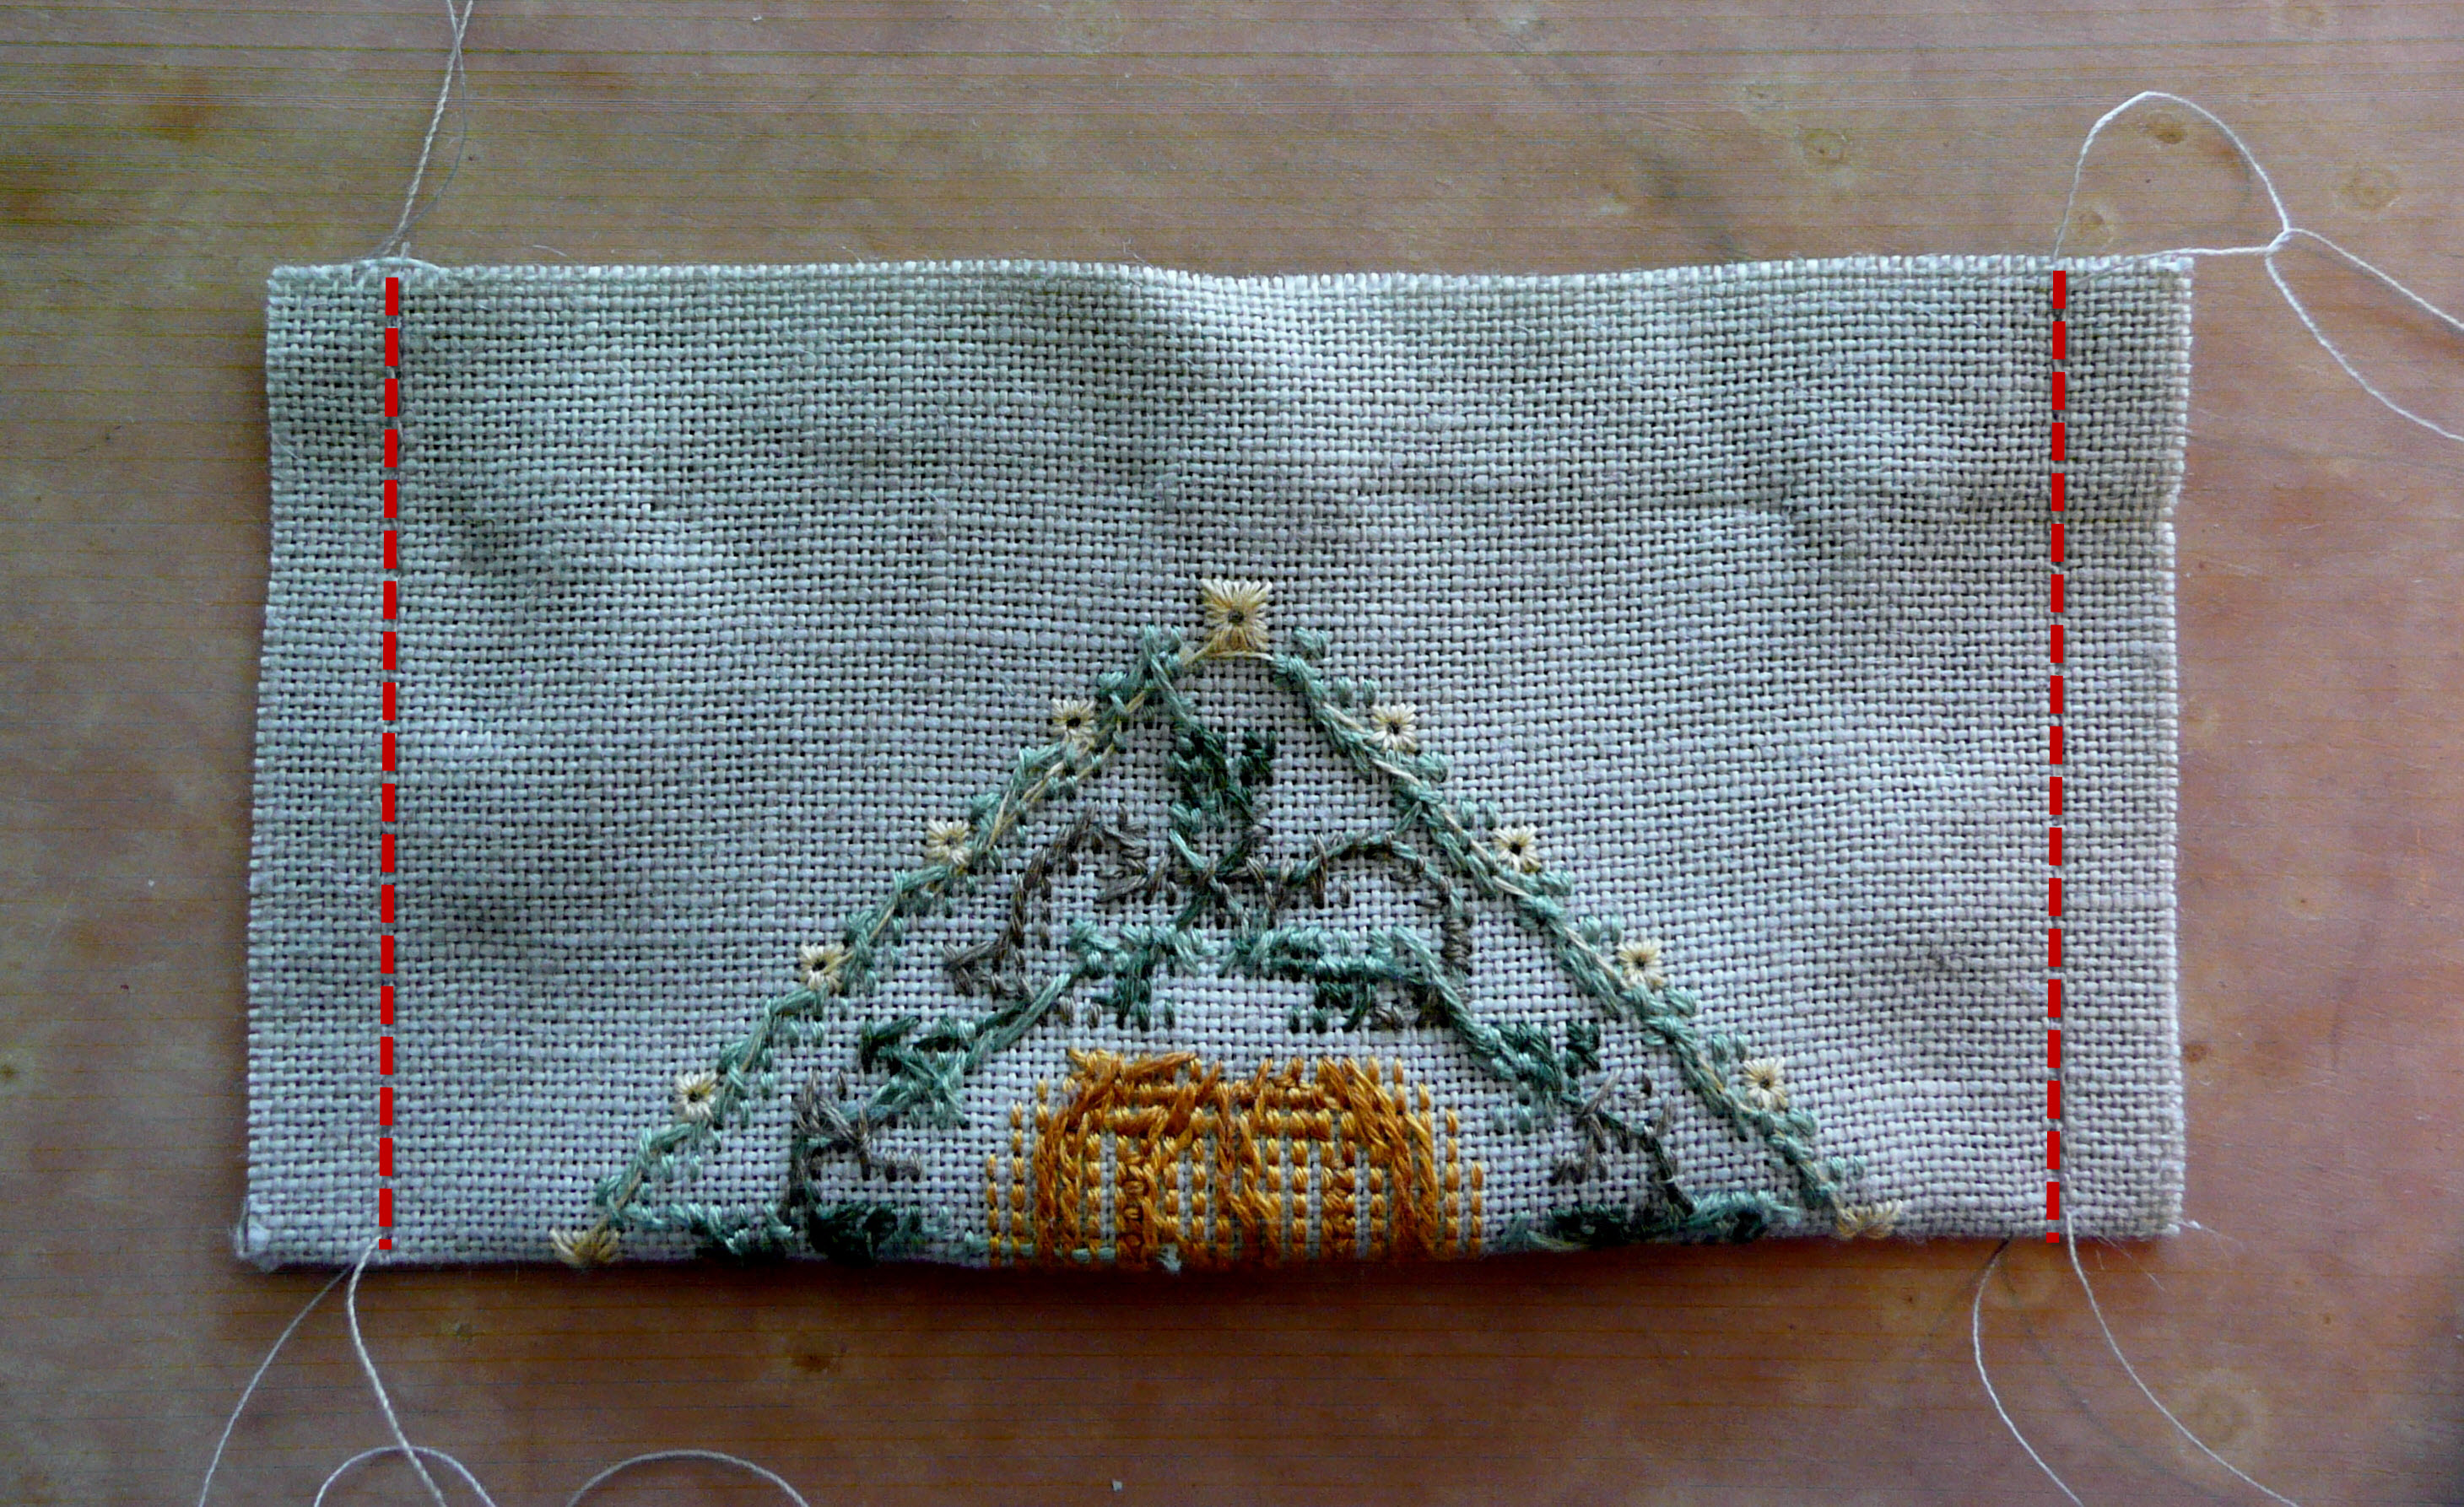
2.  Once you have cut away your edges and have a nice square piece of fabric, fold your stitching in half across the centre of the design, with the right side of the stitching facing each other.  Pin the edges together, and stitch a seam allowance at each of the short edges.  As it is hard to see my thread on the fabric, I have highlighted with red stitching where the seam line is below.

P1060927

P1060927a

I usually prefer top snip the corners slightly to make them easier to make ‘points’ once they’re turned the right-side-out.  If you do this, make sure you don’t snip them too close to the seam line, or it will unravel, and you don’t want that!

P1060928

3.  Now turn your stitched piece inside out, and put out the corners – sometimes I use a pointed chopstick to help get a nice point in the corner, but this needs to be done gently so you don’t poke a hole in the fabric!

P1060930P1060931

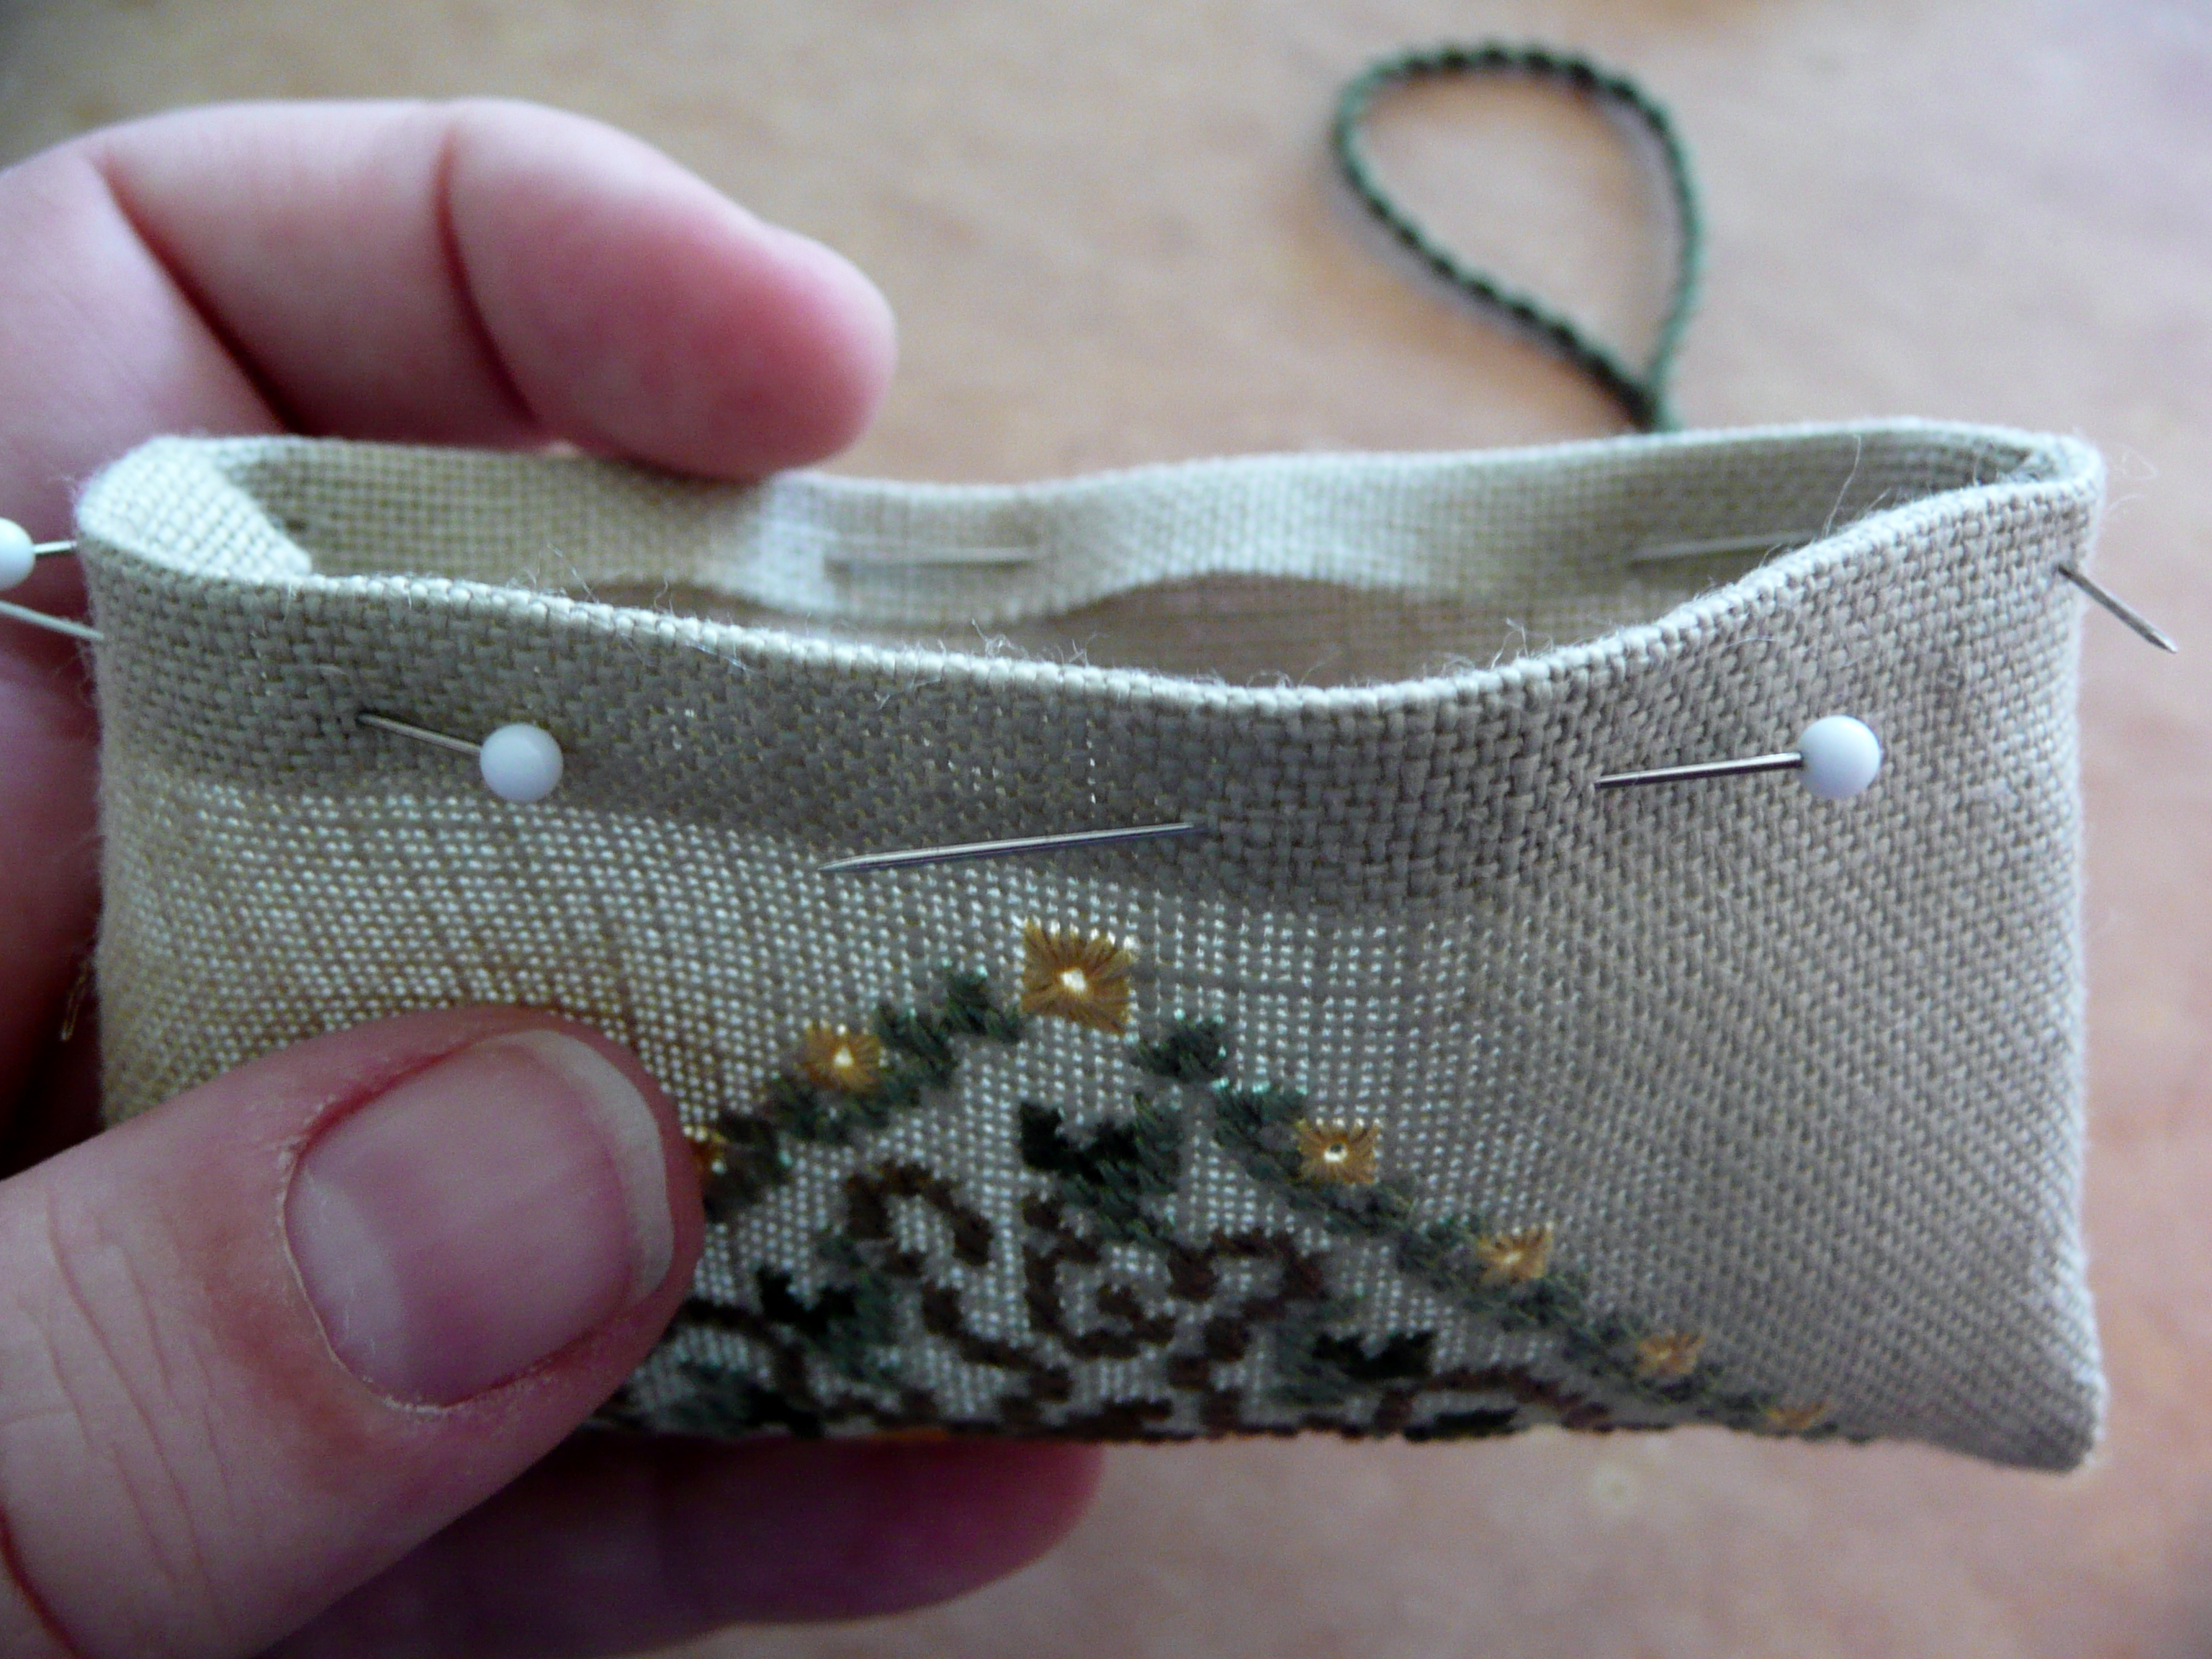
4.  Next we turn over the seam allowance on the top raw edges.  I prefer to give the seam a quick iron to make it sit flat.  You can just pin the seam allowance down around the top, or do as I do which is to baste it down using a contrasting sewing machine thread.

P1060932P1060933P1060935

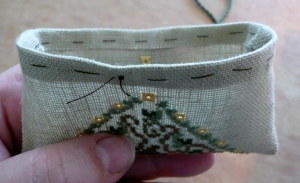
5.  Next bring the two seams together to meet in the centre, and your stitching is in a diamond shape.  I usually pop a couple of pins in temporarily to hold the seams in place.  Turn your piece over to work out which is the top of your stitching, and where the cord will eventually be attached.  In this tutorial, because the fob is so big I’ve decided to just have a cord hanger at the top without any tassel or embellishments at the bottom – another tutorial will cover the option of adding tassels to your fob later.

P1060936P1060938

6.  Next it’s time to make your cord – obviously if you have purchased ready-made cord you can omit this step, but ensure your purchased cord is quite narrow so you can knot the ends easily.  I made my cord out of DMC cotton floss, and because of the size of the fob I opted to use 4 strands of DMC for my cord as I wanted it to be a bit thicker (my preference is usually 3 strands of either DMC or pearl cotton).  Sometimes it’s trial and error as to how thick the cord will turn out.  It is generally much easier to have another person assist you in making cord, but as I’m on my own I have to improvise with whatever is handy!  I apologise in advance for the poor photos in this section, I will do another tutorial soon to show the steps more clearly …

The first thing to do is to knot each end of the group of threads together.

P1060894

P1060898

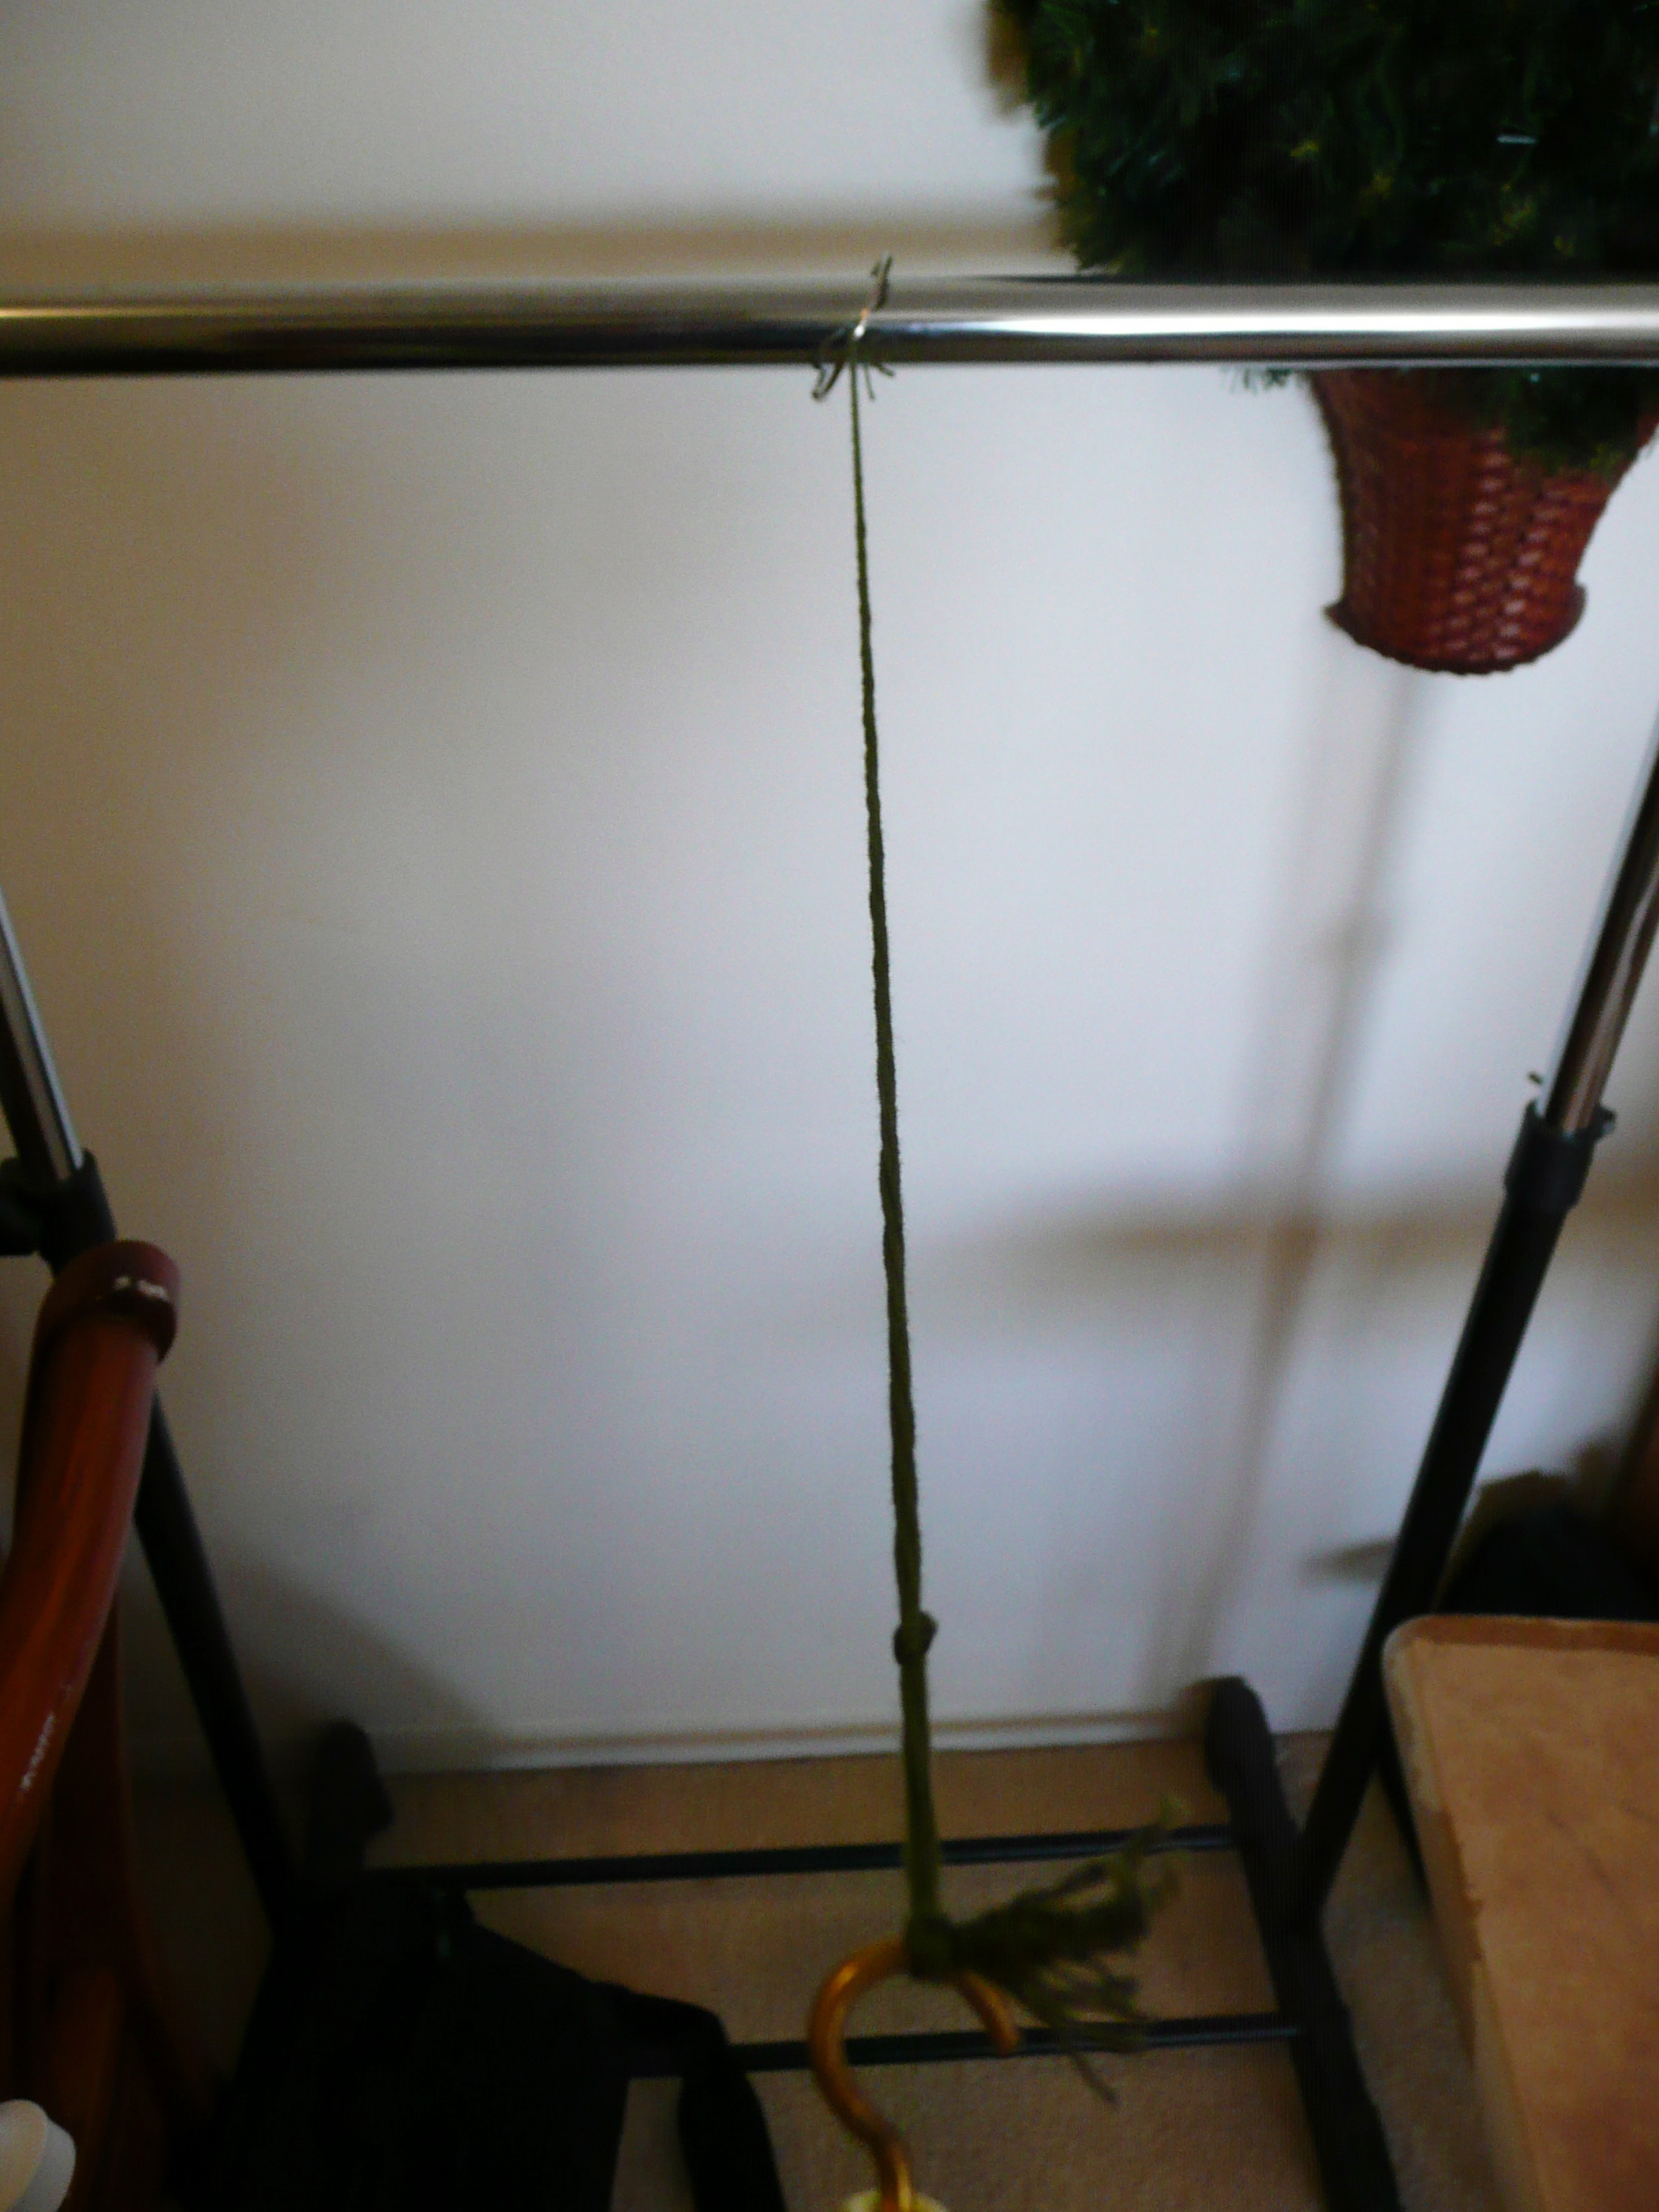
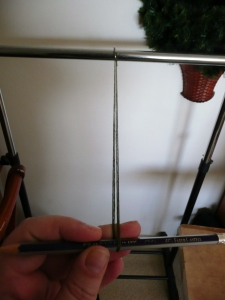
Next you need to rope in an assistance to help out by holding one end of the threads tightly, or do what I do by finding something you can attach the other end to … in my case I have a portable clothes rack that I used, by snapping a metal ring over the rail and hooking the ring through the middle of the threads at the knot end.  Alternatively you could tie the end around a door handle or something similar.

P1060899

If you have a cord drill, that’s perfect, otherwise you can make do by using a simple pencil to wind the thread.  Take your pencil and insert it through the middle of the remaining end of the thread (at the knotted end), and walk back until your thread is nice and straight.  Then start turning your pencil – it doesn’t matter in which direction you turn your pencil, as long as you continue to turn it the same way 😉  I prefer to use a cord drill as it’s so much quicker, so that’s how I finished my cord off this time round.

P1060900P1060901P1060911

You need to keep turning your pencil/cord drill until your threads are very taut.  If you slacken off your tension a little bit and your thread starts to ‘kink’ and turn on itself it’s generally twisted enough.  I let go of the tension a little bit here so I can hopefully show you what I mean about the ‘kinking’ of the thread.

P1060913P1060915P1060917

This next part is very tricky to photograph as I needed both hands …  Once your thread is twisted enough, carefully hold the middle of your twisted thread with one hand, then using your other hand bring the two knotted ends together.

P1060918P1060921

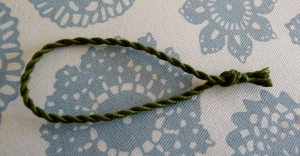
I usually use a self-made weight that I hang in the middle, but forgot to use it this time!  I’ll show that method another time, as it’s a really quick way to get the threads twisting onto themselves!  In this case, however, I just used my left hand (my right hand was still holding the two ends together) to slide up the thread about an inch, and using my thumb and forefinger gave the threads a gentle twist.  You continue to do that by working up the thread and helping the threads twice nicely onto themselves.  Eventually you end up with a beautifully twisted cord.  Then you finish off by knotting the two loose ends together so it doesn’t unravel.  And voilà your cord is finished!! 😀

P1060923P1060924

7.  Decide how long you want your cord to be – generally 3 1/2 to 4 inches is about the right length, but you may prefer to have your hanger longer than that – it’s all personal preference!  In this case I’d made my cord quite short so I could do the tutorial easier for you.  Knot the two loose ends together at your desired length.

P1060925

8.  Now it’s time to pick up your stitching once again, and we need to start stitching up the remaining seam.  My preference is to close it up using a ladder stitch, however you can use a whip-stitch if that is easier for you.  Start at the bottom of the fob, away from where the cord will be inserted.  To do a ladder stitch you just work your way alternatively up each side of the seam, taking a few threads in your needle for each stitch – this looks like the rungs of a ladder when the stitches are loose, and when you pull them tight they close up the seam very cleanly.  Keep stitching up the seam until approx 1″ away from the end.

P1060942P1060944P1060946

9.  At this point you insert your chosen stuffing.  I have opted to use teddy bear pellets for mine, as I really like the extra weight it gives the fob, especially for smaller fobs (in hindsight I probably should have used Polyfil for one this big!!).  When I stuff with pellets I use a little Tupperware funnel that I find really useful for this job – alternatively you can roll a piece of stiff paper into a funnel instead!

P1060947P1060948

10.  Now we’re on the homeward stretch, and it’s time to add the cord and close up the seam!  Take your cord, and place the knot inside the seam opening, then continue stitching up the opening to the top.  Sometimes I will take my thread through the cord at the top to stop it from moving around, but it wasn’t needed for my fob this time.  You can now remove all your basting stitches.

P1060953

And that’s it, your fob is all finished and ready to adorn your chosen pair of scissors!!

P1060956

As always, please feel free to leave comments and let me know if you have any questions.  It’s always good to know if you find the tutorials useful, or if there is something you would like to see more of, so the comments are always appreciated!

Kindest regards,

Books & Reading, Christmas, English Garden Sampler, Friends & Family, Photo Hunt, Teresa Wentzler, Works in Progress

Mixed bag of all sorts

I’ve been suffering from vertigo the last few weeks, so not a huge amount of stitching has been happening around here – I returned to work two weeks ago, and it really takes it out of me getting through the day, so I’ve been coming home and pretty much going straight to bed.  Last weekend, though, I managed to put a few stitches into my English Garden Sampler.  I managed to complete all the over-one stitching of the garden gate, and most of the foliage on the right-hand side of the gate … sadly it took the entire weekend last weekend to complete just those few stitches, so it’s going to take me quite some time to see an actual ‘finish’ of this one!  It’s one of my oldest UFOs, and I’m still in love with the design after all these years, so I’m still keen to see this one finished sooner rather than later 🙂

P1060890

I finally bit the bullet and ordered a skin for my Kindle … and it arrived this week.  Last night I ‘pimped’ my Kindle, and I totally adore it!  I can definitely recommend DecalGirl for their skins, that’s for sure, and it certainly won’t be the last I buy I’m sure … I’m starting to eye up laptop skins now too 😉

1239364_10151634352678148_1011733472_n 1005511_10151634353718148_1634706543_n

Work-wise I had a really awesome chat with my team’s “Head of” yesterday … he told me how impressed he’s been with my work with the latest project I worked on and the responsibilities I took on, and he’s going to see if he can do something about my pay rate as he feels my pay doesn’t accurately reflect the type of work I’m now doing and what he will be asking me to do in the future … you could have knocked me over with a feather!  It’s really nice to be so recognised for the work you do.  Will have to see what comes of it over the coming year, I guess 🙂

And lucky last for this post is an update on Dad … sadly he’s severely depressed, but understandably so.  He never shows his emotions, but has been spending a lot of time sitting in his chair and crying, the poor thing.  When Mum raised the issue with his surgeon he just said he needs to speak to his own GP about it.  Unfortunately the surgeon also doesn’t know why he’s still oozing pus etc from his stomach … 7 months after his surgeries!!!  It’s no wonder the poor old thing is so miserable within himself!  The surgeon said the only thing they can do is to open him up again, reverse the ileostomy bag, and have a look around while they’re in there to see where it’s coming from.  He also said, though, that Dad is in such bad shape at the moment that it is unlikely he will survive another surgery … so it’s a catch 22 😦

I’m hoping to fly over in a couple of weeks to visit and see if I can drag him out of the house for a few hours – although that would take a miracle in itself!  He told me a couple of months ago on the phone that he missed us popping down to the cafe for a coffee and chat when he was in the hospital (I used to take him down in a wheelchair).  So what I thought of doing is driving him into Auckland city and perhaps taking to a beach-front cafe at Kohimarama or somewhere else to sit and have a coffee and chat with a nice view.  He’s a stubborn old bugger, though, so it will take some convincing to get him out of the house!  I also want to talk about Enduring Powers of Attorney for them both, and all those horrible talks that are really important but are really difficult to tackle … things like getting all the life insurance policy details etc and getting a few more ducks in a row … not expected to be the most fun trip, but it needs to be done, I think …

And on that note I guess I should get my A into G and get away from the PC keyboard … time to go do some grocery shopping and a few chores … it’s laundry day, so I’d best get cracking and get on with it!!

Photo Sharing and Video Hosting at Photobucket

This week’s theme is ”Silly” and this one is in honour of Dad from his better days.

dad the fairy

Brown House Studio, Christmas Ornaments, Crazy January 2013 Challenge, Finishes, Hillside Samplings

Another WIP bites the dust!

I managed to put the final stitches into another one of my challenge pieces for this year (although I’m no longer actively completing the challenge!) … this one has always put a smile on my face when I’ve seen it, and I was very lucky to be gifted with this chart from my wishlist some time ago – it’s great to see it finally stitched up, and still puts a smile on my face with the scrummy colours and delightful charm 🙂

1002620_10151616886463148_1645801150_n

“Little Blue Potting Shed” by Brown House Studio
stitched on 32ct pewter Belfast linen
with recommended WDW/GAST threads

I also forgot that I haven’t shared another wee finish from a few days ago – this was my first attempt at getting back into stitching after being sick, and unbelievably took two whole days to stitch (yep, definitely feeling sick!).  This is supposed to be a Xmas ornie, but I’ve opted to leave off the border and remaining stitching and I’m going to turn it into a scissor fob instead 🙂

P1060883

“Star Topiary” by Hillside Samplings (2000 JCS ornie issue)
on 32ct mystery hand-dyed linen
with recommended threads (WDW & GAST)

Cross Stitch, Finishes, Halloween, Shepherd's Bush

Halloween is on it’s way!

After hearing people talk about Halloween coming soon, I got a sudden urge to do a small bit of Halloween stitching … this little project has been sitting around for far too long in my ‘to be stitched’ pile, especially as the chart was on loan from a dear friend … so it finally got to see the light of day and I stitched it up over the last 2 days.  Unfortunately I didn’t have any of the green Fuzzy Stuff thread for the witch’s hair, and I’m too impatient to wait until I order some, so I just decided to use the green DMC that is used for Frankenstein’s face.  I also changed the fabric to something that I think suits it quite well 🙂

P1060885

“October” by Shepherd’s Bush
stitched on 32ct Thunderstorm Belfast linen
with recommended DMC threads, but using DMC instead of Fuzzy Stuff for witch’s hair

I managed to do quite a bit of stitching yesterday for the first time in weeks, and hope to have another happy dance in another day or two – a project I started in March this year when I was in NZ … and which was in my planned 2013 project stitching (Little Blue Potting Shed by Brown House Studio).