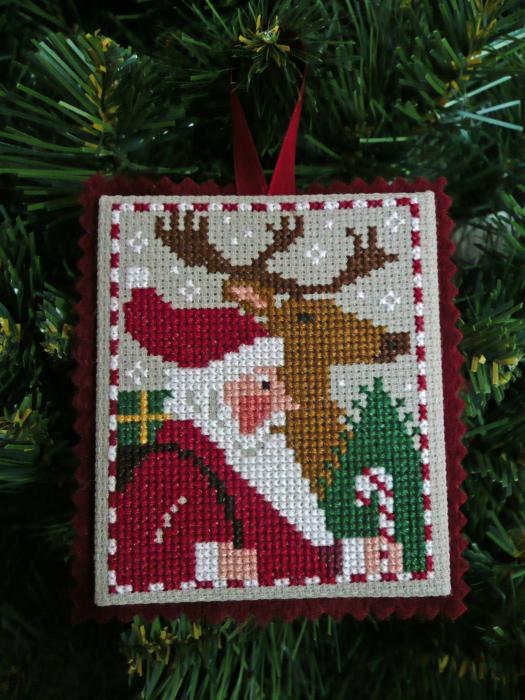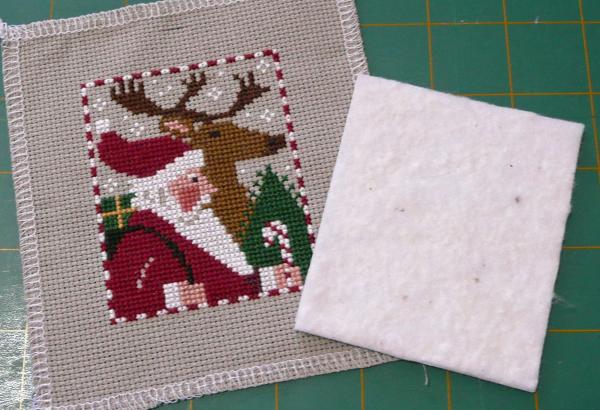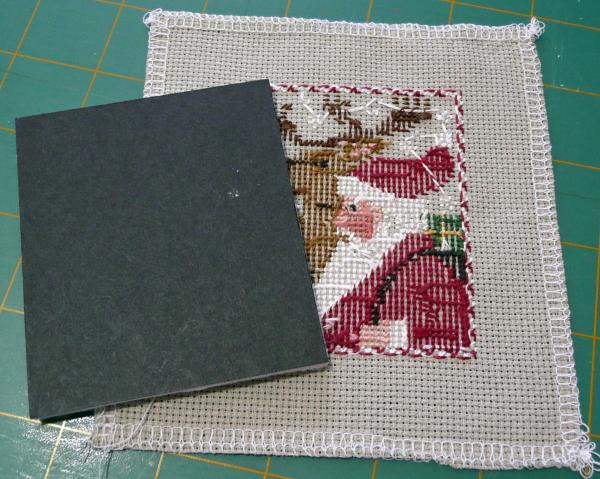
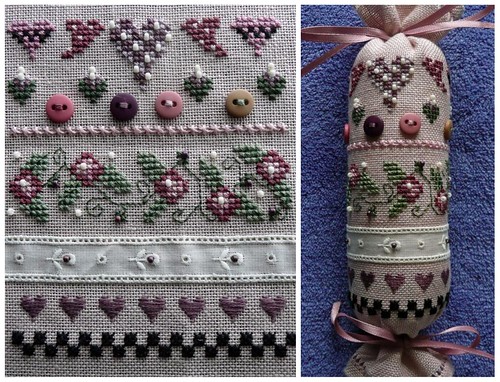
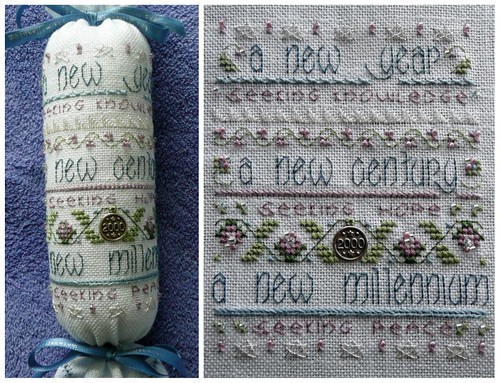
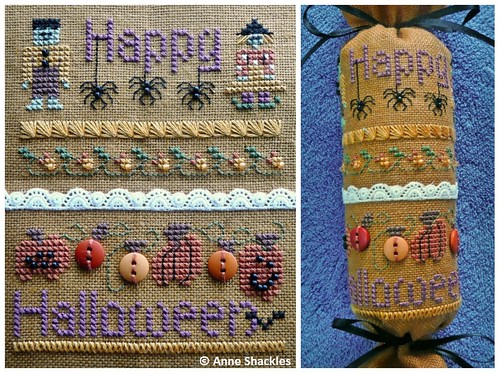
As mentioned in my previous post, I spent pretty much the entire day yesterday finish-finishing 4 Shepherd’s Bush needlerolls. Following are the fruits of my labour (including improved photos of my latest two needleroll finishes, as previously I could only scan them and the quality was dreadful).
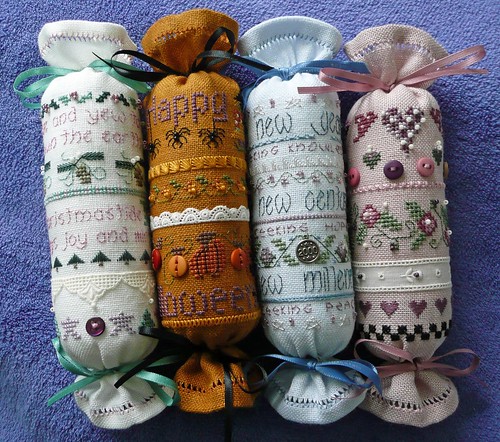
Folk Heart Needleroll
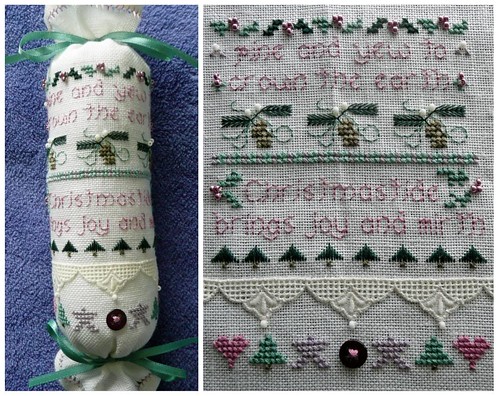
Millennium Roll
Halloween Roll
Pine Needle Roll
During my needleroll ‘frenzy’ yesterday I decided to sit down in front of the TV and downloaded a couple of free TV episodes on TiVo, and watched Episode 1 of Season 1 of The Tudors and the same of The Guardian. After my finishing session I also decided to blob out in front of the gogglebox and did a teeny tiny bit of stitching on a new start … I’m thinking of starting a bit of a mini-rotation of all the projects that I currently have kitted up with DMC, as I’m constantly having to keep raiding them for new projects (although I’ve made it easier now by having all my kitted up projects with all their contents on a spreadsheet, so at least I know which project has which DMC now!). This was the result of my bit of TV viewing – while watching The Ugly Truth (a truly stupid movie I have to say!) and half of the Taking of Pelham 123. As you can see, I did a LOT! haha. (Sorry for the crappy photo!)

This will eventually be Just Nan’s Ghastly Ghostly Ghouls. I’ve been meaning to start this one for weeks, but I needed to tea-dye the fabric to give it a slightly darker look and it’s taken me this long to finally drag the tea bags out of the cupboard! The last time I stitched ghosts on Lambswool linen they disappeared into the background, so fingers crossed this time the slightly darker colouration will see them showing up more (I’ll find out soon enough, as they’re getting stitched next).
While I was tea-dyeing, I also threw in a piece of cotton lace that I needed to dye so I can complete my first PIF ready to be sent off to its new home. I’ve still dickering over what to stitch for my next two ‘victims’, but I do have some ideas brewing in my little mind and have some designs pulled out into a separate pile ready to start work. I also need to decide on which design to use for my Scissor Pocket exchange, as I need to start working on that very very soon.
As for the rest of my finishing weekend, the question I’m asking myself is “what now?” – I still have a large pile of finishing to do, I just have to decide what to concentrate on first. I have the following to choose from:
- Christmas flat-fold
- Tie-on pillow for (next) Easter
- Bunnies in my Garden set
- Chatelaine’s Stitching Leporello
- 3 x Scissor fobs
- Hocus Pocus pinkeep
- 2 x picture frames – then the mats cut and projects laced
- Hardanger needlebook
- Numerous Christmas ornies
- Lavender bag (Victoria Sampler)
- 2 more needlerolls
- 2 x bellpulls
- Santa quilted wallhanging (halfway through when sewing machine broke down last time)
- Canvaswork pincushion
- Quilt for my best friend’s first born (who’s now at school, and she’s since had two more kids!! ahem …)
- Quilting bag – pretty much stitched, but needs to be put together
- and a whole heap more that I can’t remember right now!
I did want to finish off a scissor fob tutorial with one of my pieces, so perhaps I’ll throw that into the mix this weekend, plus finishing off my Christmas ornie tutorial which is almost finished. If nothing else, I’m certainly not short of finishing items to be done!! Of course the sooner I get off this PC the quicker I’ll get to make a start as well … so perhaps I’d better leave it at that and go make a start! 😉